Painted Pumpkins & Sunflower Fields!
Welcome to our Create With Stamping Friends Inspiration Monday challenges. Fall is definitely in the air and this week’s inspiration challenge is this gorgeous fall photo:
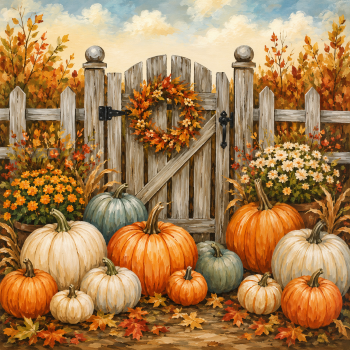
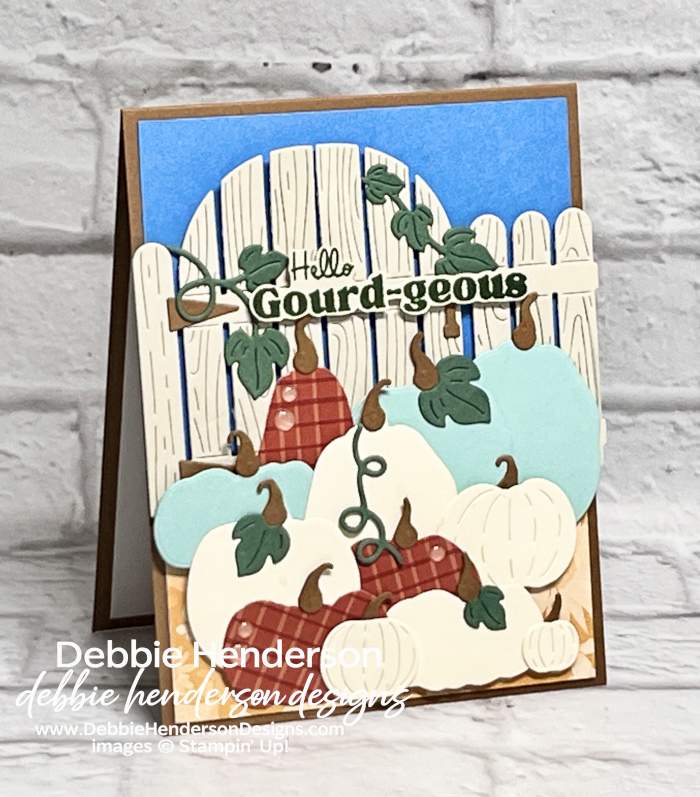
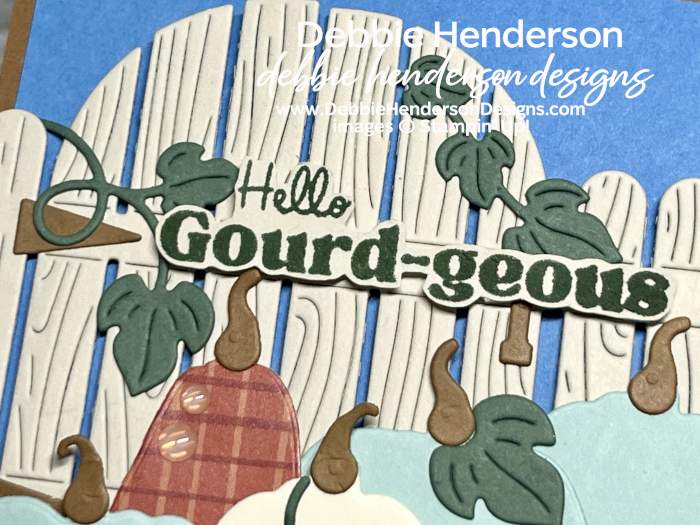
There’s so much to look at in the photo and so much you can use for inspiration. For my card I added the fence, gate and lots of pumpkins in many colors:
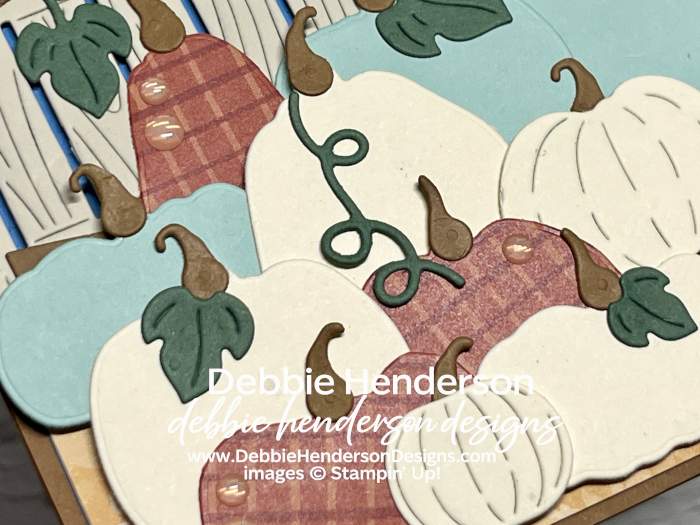
I even used a designer paper print for some of my pumpkins and added a little bit of bling too!
Stampin’ Up! Products Used:
- Stamps: Painted Pumpkins
- Inks: Peaceful Pine
- Cardstock: Pecan Pie, Azure Afternoon, Basic Beige, Peaceful Pink, Very Vanilla, Pool Party
- Designer Paper: Sunflower Fields
- Tools & Accessories: Painted Pumpkins Dies, Glossy Garden Dots, Stampin’ Dimensionals, Paper Snips
Card Recipe:
- Card Base: Pecan Pie Cardstock 11 x 4-1/4. Score and fold at 5-1/2.
- Layer 2: Azure Afternoon Cardstock 5-1/4 x 4. Glue to card base.
- Layer 3: Sunflower Fields Designer Paper 4 x 2. Glue even at the bottom to the Azure Afternoon layer.
- Gate/Fence: Use the gate die and the fence die with Basic Beige Cardstock to cut one of each. Glue to card front with Stampin’ Dimensionals about 1/2″ from the top.
- Hingles/Handle: Use the dies to cut 2 hinges and 1 handle. Glue to the fence & gate.
- Pumpkins: Use the pumpkin dies to cut several pumpkins with Very Vanilla Pool Party and Sunflower Fields Designer Paper. Cut pumpkins stems with the dies and Pecan Pie Cardstock for each pumpkin (you may have to trim the stems that are already there after gluing them in place). Glue all of the pumpkins with Stampin’ Dimensionals by layering them.
- Leaves: Use the viney leaves die and the single leaf dies with Peaceful Pine Cardstock. Glue to the gate, fence and pumpkins as shown.
- Sentiment: Stamp the sentiment on Basic Beige Cardstock with Peaceful Pine Ink. Cut around the sentiment with Paper Snips.
- Bling: Add Glossy Garden Dots to the designer paper pumpkins.
Make sure you visit Create With Stamping Friends to see what Connie created for our team this week and see our newest tutorial Collection too:



Leave a Reply