Celebrations Theme!
Welcome to Create With Stamping Friends Creatively Simple! We have been “celebrating” all month long and next week, we will reveal our new theme for August!
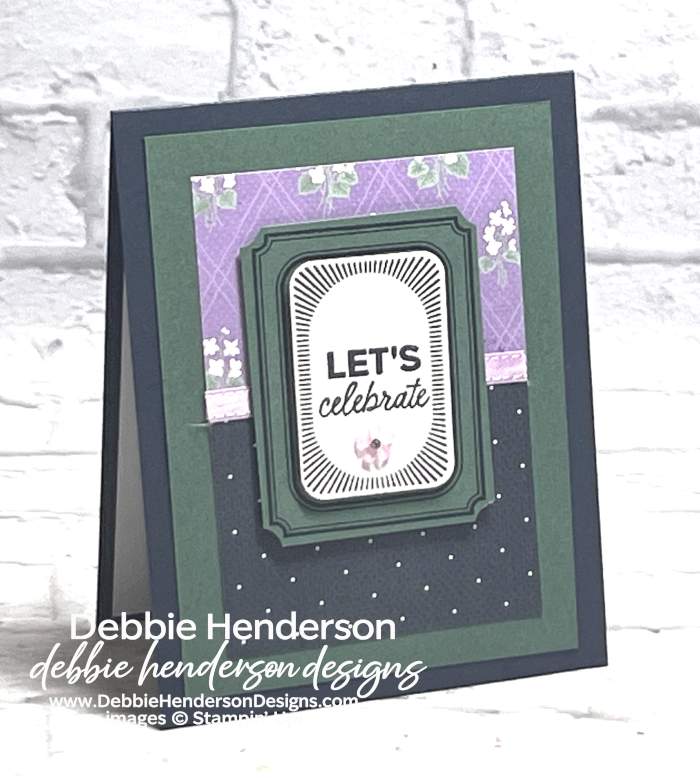
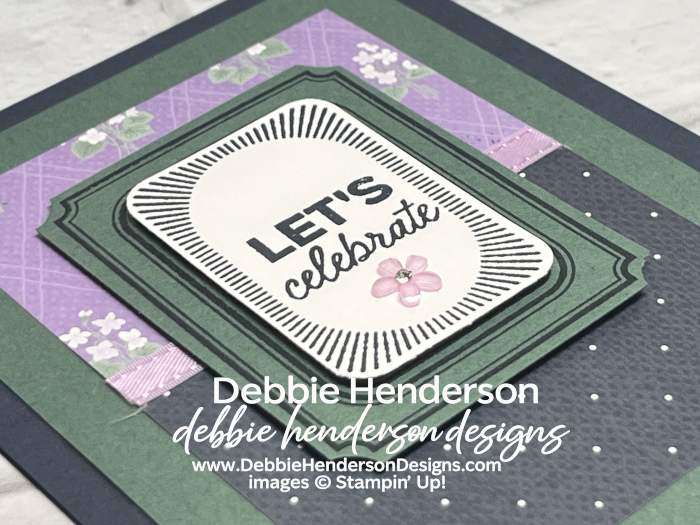
I chose to use the Exciting Times Bundle for my Creatively Simple card today and created a “Clean & Simple” look with several layers of cardstock and designer paper:
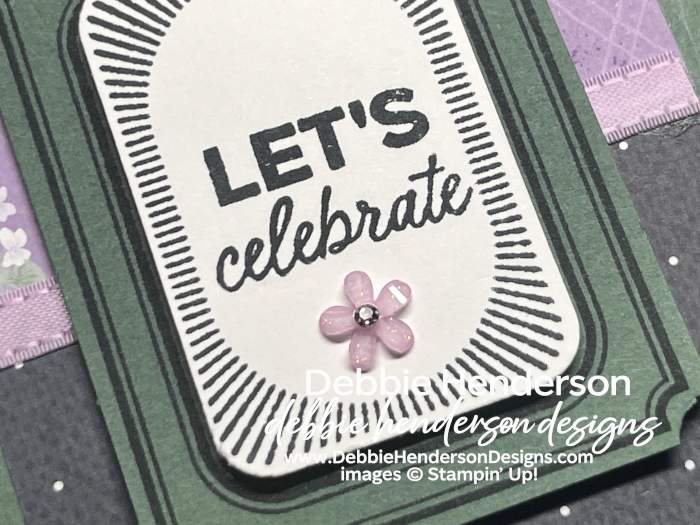
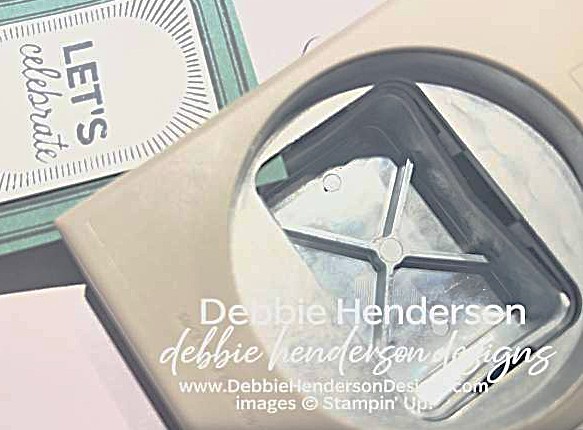
The sentiment is layered over a stamped and cut label shape and I’ll show you a tip about cutting the corners around the stamped frame:
Stampin’ Up! Products Used:
- Stamps: Exciting Times
- Inks: Secret Sea
- Cardstock: Secret Sea, Peaceful Pine, Basic White
- Designer Paper: Violet Dreams
- Tools & Accessories: Rounded Rectangular Punch, Fresh Freesia Satin Ribbon, Adhesive-Backed Blooms, Stampin’ Dimensionals
Card Recipe:
- Card Base: Secret Sea Cardstock 11 x 4-1/4. Score and fold at 5-1/2.
- Layer 2: Peaceful Pine Cardstock 5 x 3-3/4. Glue to card base.
- Layer 3: Violet Dreams Designer Paper 4-1/4 x 3. Cut on the long side at 2-1/4 and flip one piece to the opposite print side. Glue together to card front.
- Ribbon: Glue a piece of ribbon over the two designer paper layers where they meet.
- Frame: Stamp the frame image on Peaceful Pine Cardstock 2-7/8 x 2-1/4 with Secret Sea Ink. Flip the punch over so you can see the back. Insert each corner on the rounded end of the punch to create 4 cuts like this:
- Glue frame to card front with Stampin’ Dimensionals.
- Sentiment: Stamp the sentiment and frame on Basic White Cardstock with Secret Sea Ink. Cut with the punch. Glue over the frame layer with Stampin’ Dimensionals.
- Bling: Add Adhesive-Backed Blooms below the sentiment.
Make sure you visit Create With Stamping Friends to see what Connie created for our team this week and visit our tutorial page to see our latest collections.


Leave a Reply