Hoppy Easter Theme!
Welcome to Create With Stamping Friends Creatively Simple! Connie and I create simple cards with a theme each week. We have a brand new theme for the month: of February:

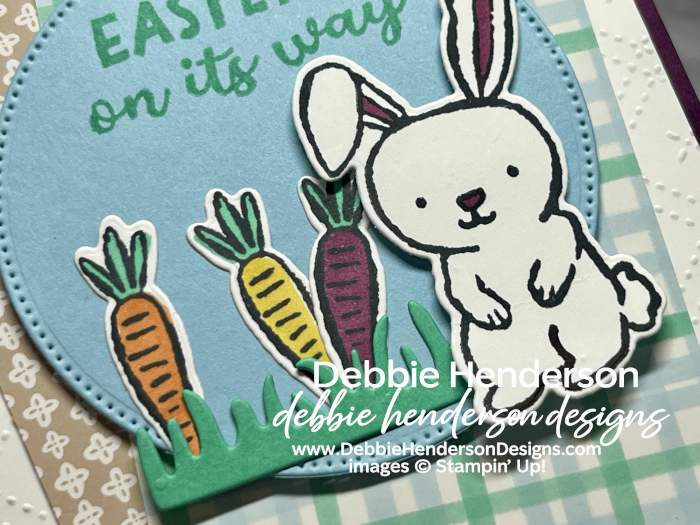
I added just a few layers of designer paper and cardstock to keep this card simple!

Have you ever eaten colored carrots? The first time I spied them, I thought what? Purple carrots? I have eaten them and you know what? There’s really no difference in taste, just color. I opted to use Stampin’ Blends to add 3 different colors to my carrots because there truly is such a thing!
Stampin’ Up! Products Used:
- Stamps: Easter Basket
- Inks: Memento Black
- Stampin’ Blends: Blackberry Bliss, Pumpkin Pie, Darling Duckling
- Cardstock: Blackberry Bliss, Balmy Blue, Shy Shamrock, Basic White
- Designer Paper: Easter Joy
- Tools & Accessories: Easter Basket Dies, Beautiful Pattern Embossing Folder, Stylish Shapes Dies, Stampin’ Dimensionals
Card Recipe:
- Card Base: Blackberry Bliss Cardstock 11 x 4-1/4. Score and fold at 5-1/2.
- Layer 2: Basic White Cardstock 5-1/4 x 4. Emboss with the Beautiful Pattern Embossing Folder. Glue to card base.
- Layer 3 & 4: Two patterns of the Easter Joy Designer Paper 4 x 2-3/4. Glue a different angles to card front.
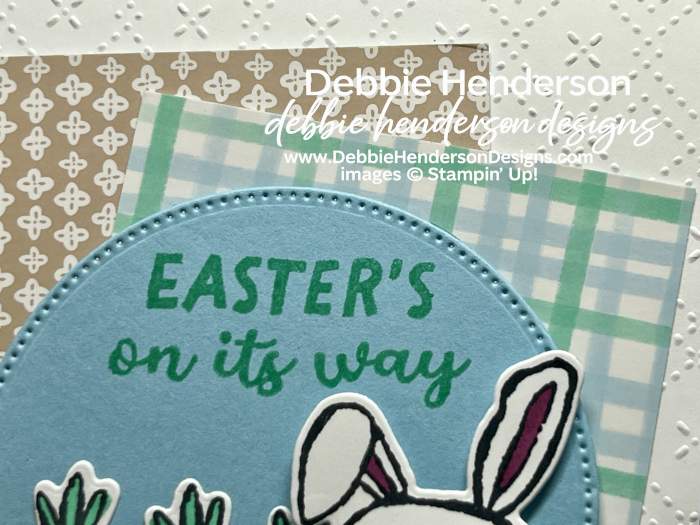
- Layer 5: Balmy Blue Cardstock cut with the 3 circle from Stylish Shapes Dies. Stamp the sentiment at the top with Shy Shamrock Ink. Glue to card front with Stampin’ Dimensionals.
- Grass: Shy Shamrock Cardstock cut with the grass die. Glue to the bottom of the circle.
- Rabbit: Stamp the bunny image on Basic White Cardstock with Memento Black Ink. Cut with the die. Color the nose and inside the ears with Stampin’ Blends. Glue to the circle at the right with Stampin’ Dimensionals.
- Carrots: Stamp 3 carrot images with Memento Black Ink. Color with Stampin’ Blends. Cut with the die. Tuck and glue under the grass.
Make sure you visit Create With Stamping Friends to see what Connie created for our team this week and visit our tutorial page to see our latest collections.


Leave a Reply