Birthday Wishes Theme!

Welcome to our Saturday Blog Hop at Create With Stamping Friends. I think one of the most created cards for cardmakers is probably birthday cards followed by Christmas or maybe vice-versa. That’s our theme this week for our weekly blog hop: Birthday Wishes!

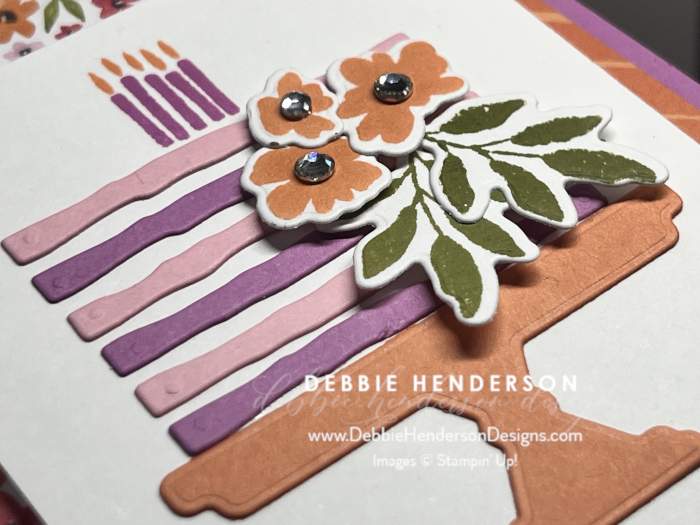
I loved diecutting all of the layers for my birthday cake. It’s made easy using dies from the Cake Celebrations Bundle. You can make your cake as low or as high as you wish. And the pretty stamped and diecut flowers are so pretty too!
Stampin’ Up! Products Used:
- Stamps: Cake Celebrations
- Inks: Old Olive, Timid Tiger, Petunia Pop
- Cardstock: Petunia Pop, Pretty In Pink, Timid Tiger, Basic White
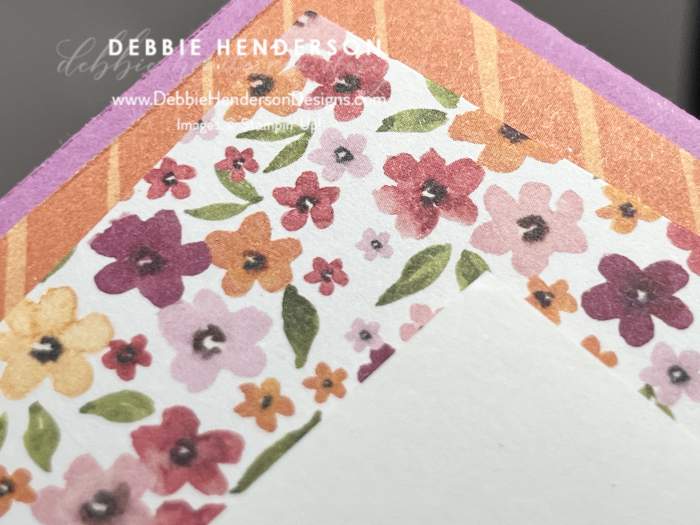
- Designer Paper: Celebratory Sips
- Tools & Accessories: Cake Celebrations Dies, Rhinestone Basic Jewels, Stampin’ Dimensionals.
Card Recipe:
- Card Base: Petunia Pop 11 x 4-1/4. Score and fold at 5-1/2.
- Layer 2: Celebratory Sips Designer Paper 5-1/4 x 4. Glue to card base.
- Layer 3: Celebratory Sips Designer Paper 4 x 2-3/4. Glue to the top left at an angle.
- Layer 4: Basic White Cardstock 4-1/4 x 2-3/4. Follow these steps:
- Stamp the sentiment at the bottom with Old Olive Ink.
- Cut the cake pedestal with Timid Tiger Cardstock and glue above the sentiment.
- Cut cake layers with the dies. I cut 3 each with Petunia Pop and Pretty In Pink Cardstocks. Glue above the pedestal leaving 1/8″ between the layers.
- Stamp the candles with Petunia Pop Ink above the cake layers.
- Stamp the candle flames with Timid Tiger Ink above the candles.
- Stamp the 3 flowers on Basic White Cardstock with Timid Tiger Ink. Cut with the dies. Glue to cake with dimensionals.
- Stamp the 2 leaves with Old Olive Ink on Basic White Cardstock. Cut with the die. Glue tucked under the flowers with dimensionals.
- Glue white layer to card front at the bottom right at an angle with dimensionals.
- Bling: Add Rhinestone Basic Jewels to the center of each flower.
Now you can follow the rest of the Saturday Blog Hop by clicking on the links below to visit my talented teammates! Click BACK to visit the Create With Stamping Friends Blog and NEXT to visit Lori de Groot:

Check out our newest tutorial Collection at Create With Stamping Friends:


Leave a Reply