Spotlight On Metallics!
Welcome to our Saturday Blog Hop at Create With Stamping Friends and our metallics theme for this week. I used quite a few products from our Hot Foil line for my metallics card:
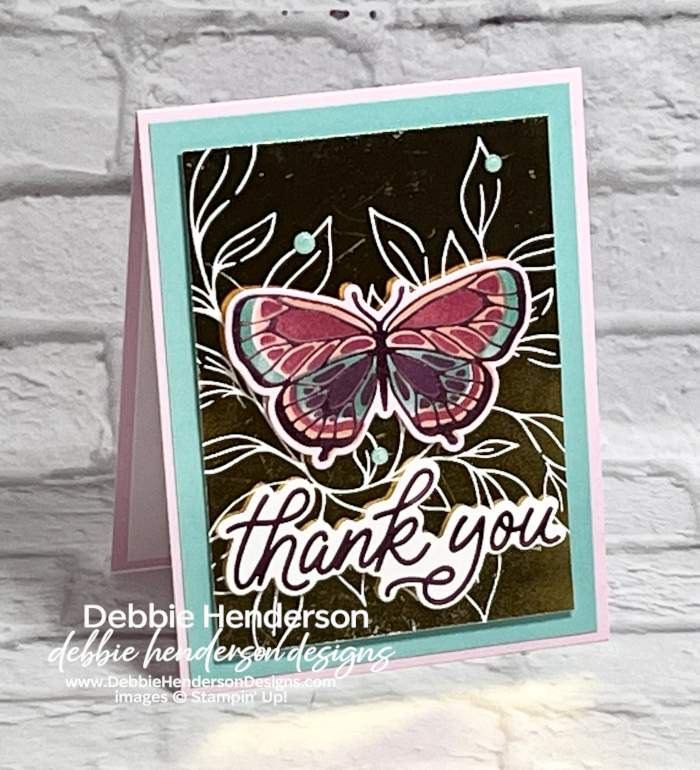
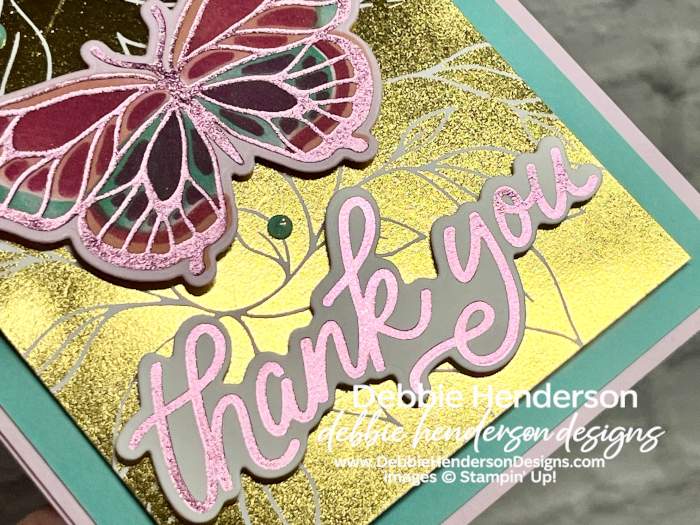
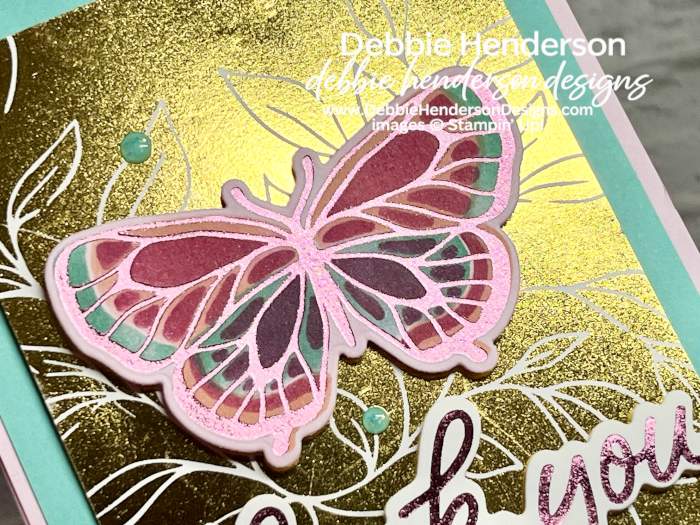
You can see the shimmery shine of the Gold & Light Pink Stampin’ Hot Foil Rolls and the gold layer has leaves on the background. The layer is actually foiled with the leftover sheet that I used on a previous card. I saved the sheet and used the Reverse Hot Foil Die. It’s so pretty in person!
Stampin’ Up! Products Used:
- Stamps: None
- Inks: Coastal Cabana, Strawberry Slush, Bubble Bath, Gorgeous Grape
- Cardstock: Bubble Bath, Coastal Cabana, Basic White
- Tools & Accessories: Botanical Glow Hot Foil Die, Butterfly Flight Hot Foil Dies, Classic Greetings Hot Foil Dies, Reverse Hot Foil Die, Light Pink Stampin’ Hot Foil, Gold Stampin’ Hot Foil, Blending Brushes, Stampin’ Dimensionals
Card Recipe:
- Card Base: Bubble Bath Cardstock 11 x 4-1/4. Score and fold at 5-1/2.
- Layer 2: Coastal Cabana Cardstock 5-1/4 x 4. Glue to card base.
- Layer 3: Basic White Cardstock 4-3/4 x 3-1/2. Hot foil with the Reverse Hot Foil Die and a leftover Gold Stampin’ Hot Foil from the Botanical Glow Hot Foil Die. Glue to card front with Stampin’ Dimensionals.
- Butterflue: Hot foil the butterfly with Butterfly Flight Hot Foil Dies and Light Pink Stampin’ Hot Foil. Color the butterfly with Blending Brushes and the inks. Cut with the die. Glue to card front with Stampin’ Dimensionals.
- Sentiment: Hot foil the sentiment from Classic Greetings Hot Foil Dies on Basic White Cardstock with Light Pink Stampin’ Hot Foil. Cut with the die. Glue below the butterfly with Stampin’ Dimensionals.
- Bling: Add Shimmering Dots to the gold background.
Now you can follow the rest of the Saturday Blog Hop by clicking on the links below to visit my talented teammates! Click BACK to visit the Create With Stamping Friends Blog and NEXT to visit Lori de Groot:


Check out our newest tutorial Collection at Create With Stamping Friends:



Leave a Reply