Favorite New Mini Catalog or New Online Exclusives Bundle!
Welcome to our Saturday Blog Hop at Create With Stamping Friends. We all picked our favorite bundles from the new catalog or online exclusives and I chose to feature the Noel Tidings Bundle. Why? Because I’m from Maine and we have lots of pinecones and I love them!
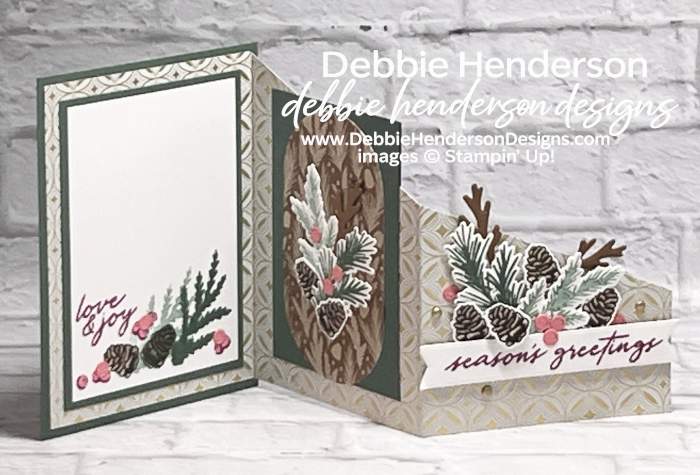
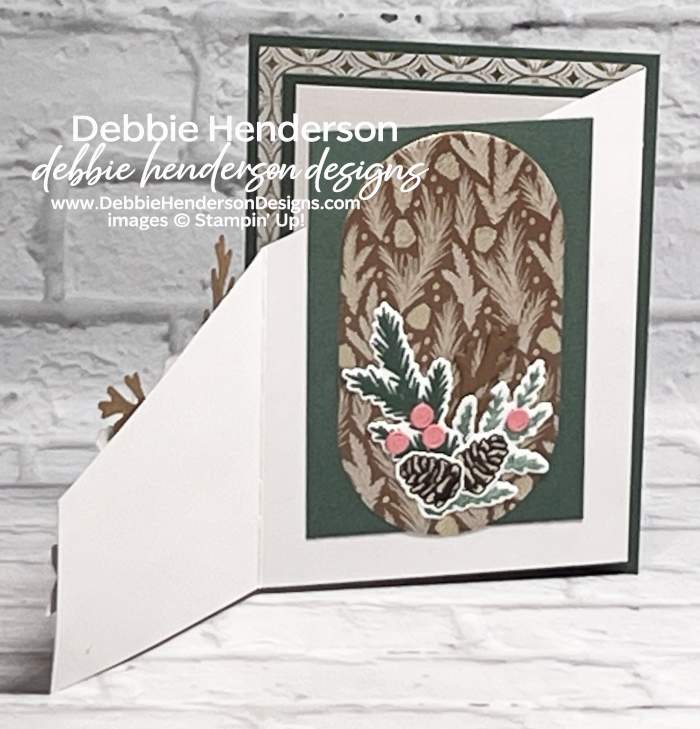
My card is actually a Tri-Fold Card Fold and I had 6 panels to work with. The photo above shows you three of the panels with lots of layers on all three.
This is what the card looks like when it’s folded flat:
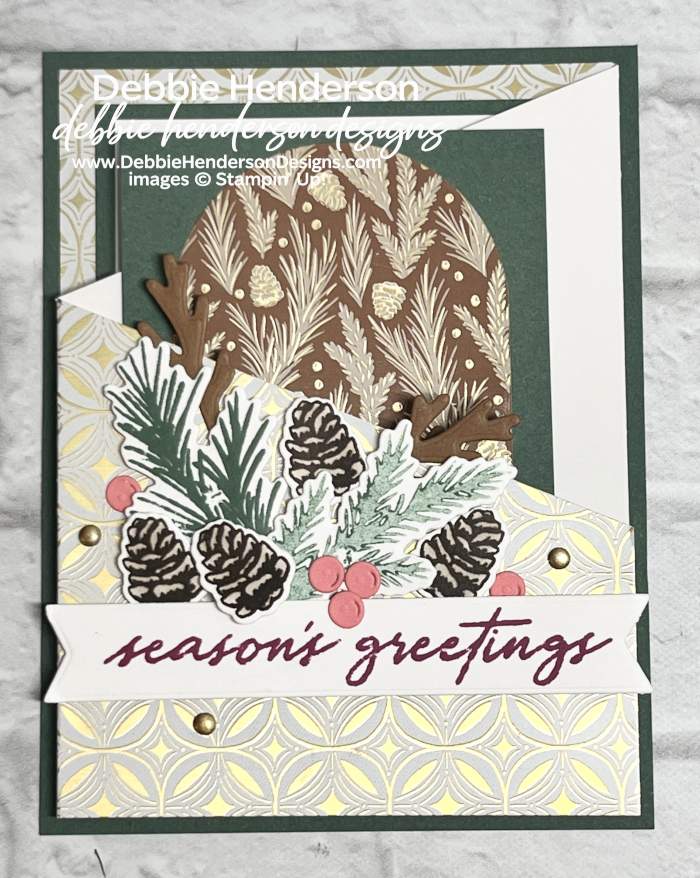
You can see how pretty the Neutral Noel Designer Paper is with all of the gold foiling on some of the sheets. When you turn the card to the inner layers, this is what you’ll see:
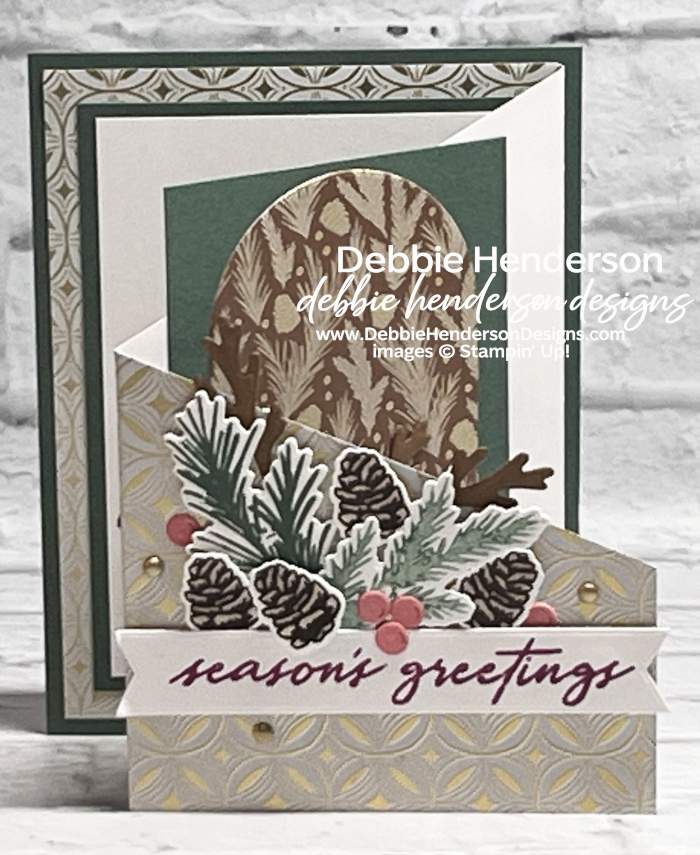
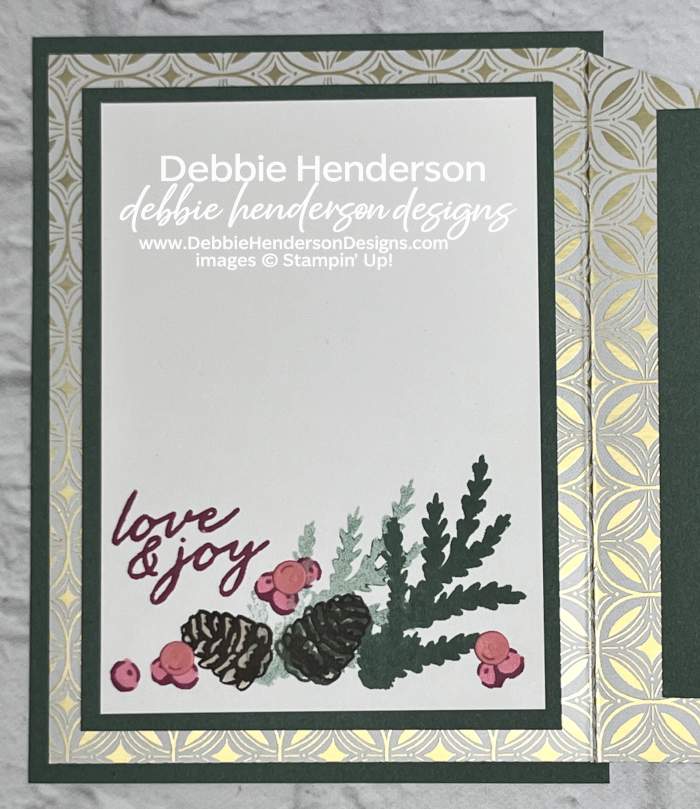
The designer paper is white on the 2nd side. I decorated the center panel so that it has the same layers on the opposite side. So everything is glued back-to-back on the center layer. These are more photos of the first 3 sections:
Stampin’ Up! Products Used:
- Stamps: Noel Tidings
- Inks: Garden Green, Early Espresso, Cherry Cobbler
- Stampin’ Blends: Crumb Cake, Strawberry Slush
- Cardstock: Garden Green, Strawberry Slush, Pecan Pie, Basic White
- Designer Paper: Neutral Noel
- Tools & Accessories: Noel Tidings Dies, Stampin’ Dimensionals, Gold Adhesive-Backed Dots
Card Recipe:
- Card Base: Garden Green Cardstock 5-1/2 x 4-1/4.
- Layer 2: Neutral Noel Designer Paper 12 x 5-1/4. Score at 4 & 8. On the panel on the right, measure 2″ from the bottom. Use a Paper Trimmer to cut from the 2″ mark up to the 2nd score line at the top. Add adhesive to the back of the panel on the left and glue to card base.
Here are the layers for each section on the designer paper:
- Section 1 (left section):
- Garden Green Cardstock 4-3/4 x 3-1/2. Glue to designer paper.
- Basic White Cardstock 4-1/2 x 3-1/4. Glue to garden green layer and add the following to the bottom:
- Stamp 2 branch images to the right without reinking with Garden Green Ink.
- Stamp 2 pinecones with Early Espresso Ink.
- Color the pinecones with Crumb Cake Stampin’ Blends.
- Stamp several holly berries with Cherry Cobbler Ink.
- Color the berries with Strawberry Slush Stampin’ Blends.
- Diecut 3 holly berries with the die and Strawberry Slush Cardstock. Glue over the stamped berries.
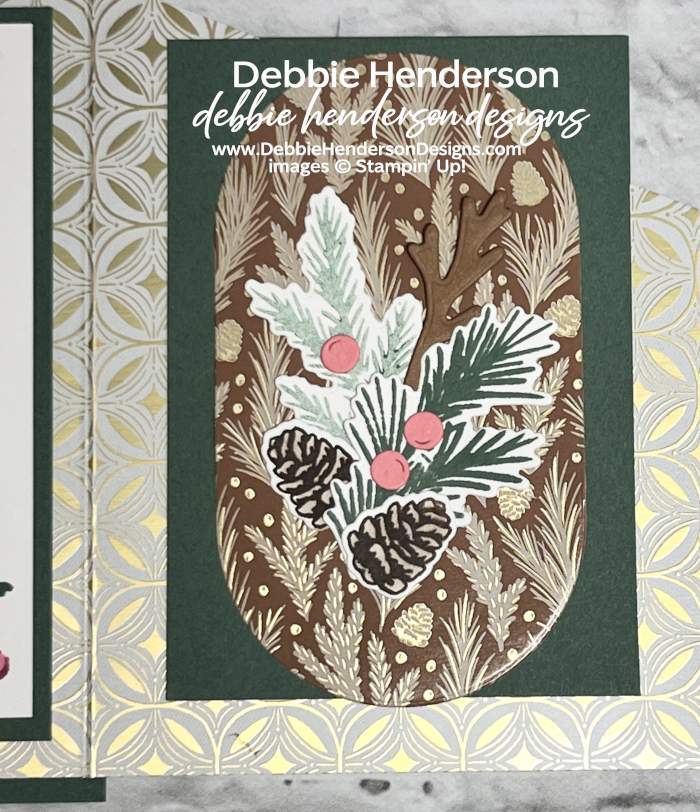
- Section 2 (front and back center sections):
- Garden Green Cardstock 4-1/4 x 3 (cut 2). Glue to the center section on both sides of the designer paper, matching up the top and sides.
- Neutral Noel Designer Paper cut with the oval die (cut 2). Glue to the garden green cardstock layers on both sides.
- Basic White Cardstock: Stamp and diecut the following:
- Stamp 4 branches with Garden Green Ink, some without reinking. Cut with the dies. Glue 2 branches to each side of the ovals.
- Stamp 4 pinecones with Early Espresso Ink. Color with Stampin’ Blends. Cut with the dies. Glue 2 pinecones to each oval.
- Cut 2 skinny branches with Pecan Pie Cardstock. Tuck and glue 1 branch at the top of the branches on both ovals.
- Cut 7 holly berries with the dies and Strawberry Slush Cardstock. Glue to the branches on both ovals.
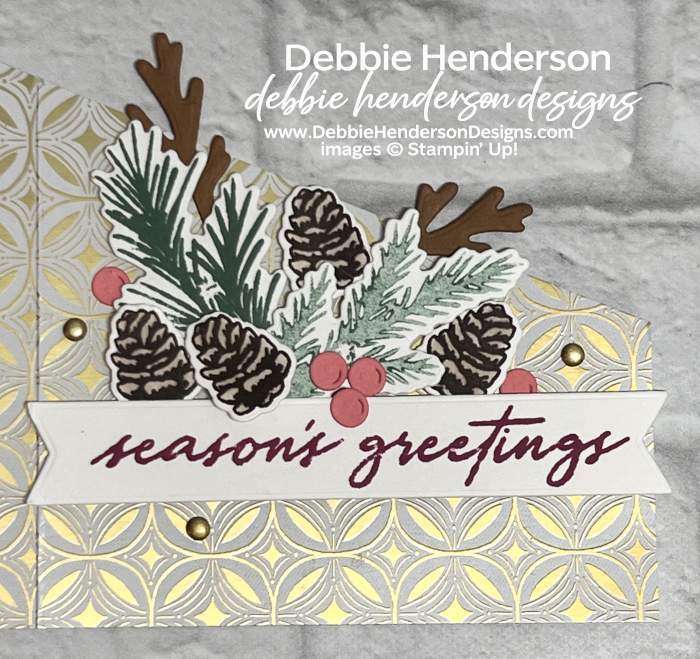
- Section 3 (right section):
- Basic White Cardstock: Stamp the sentiment with Cherry Cobbler Ink. Cut with the long banner die. Glue 3/4″ from the bottom with Stampin’ Dimensionals.
- Stamp 2 branches with Garden Green Ink. For a lighter color on one branch, stamp on scrap paper first and without reinking. Cut the branches with the dies. Tuck and glue under the sentiment with Stampin’ Dimensionals.
- Cut 2 skinny branches with the die and Pecan Pie Cardstock. Tuck and glue under the stamped branches.
- Stamp 4 pinecones with Early Espresso Ink. Color with Stampin’ Blends. Cut with the dies. Glue with Stampin’ Dimensionals
- Cut 5 holly berries with the dies and Strawberry Slush Cardstock. Glue as shown
- Add Gold Adhesive-Backed Dots to the designer paper around the stamped images.
Now you can follow the rest of the Saturday Blog Hop by clicking on the links below to visit my talented teammates! Click BACK to visit the Create With Stamping Friends Blog and NEXT to visit Lori de Groot:

Check out our newest tutorial Collection at Create With Stamping Friends:




Leave a Reply