• Skip to secondary menu
  • Skip to main content
  • Skip to primary sidebar
  • Clearance Rack
  • Product Suites
  • Bundled Savings

Debbie Henderson, Stampin' Up! Demonstrator

Daily papercrafting inspiration, free project sheets, Merry Christmas Card Club, and card kits.

  • Home
  • Events
  • Specials
  • Shop
    • Shop Stampin’ Up! Online
  • Join My Team
    • Sign Up Online!
  • Contact
  • Retired Stampin’ Up! Products For Sale

Create With Stamping Friends Creatively Simple 256

July 28, 2026 Leave a Comment

Celebrations Theme!

Welcome to Create With Stamping Friends Creatively Simple! We have been “celebrating” all month long and next week, we will reveal our new theme for August!
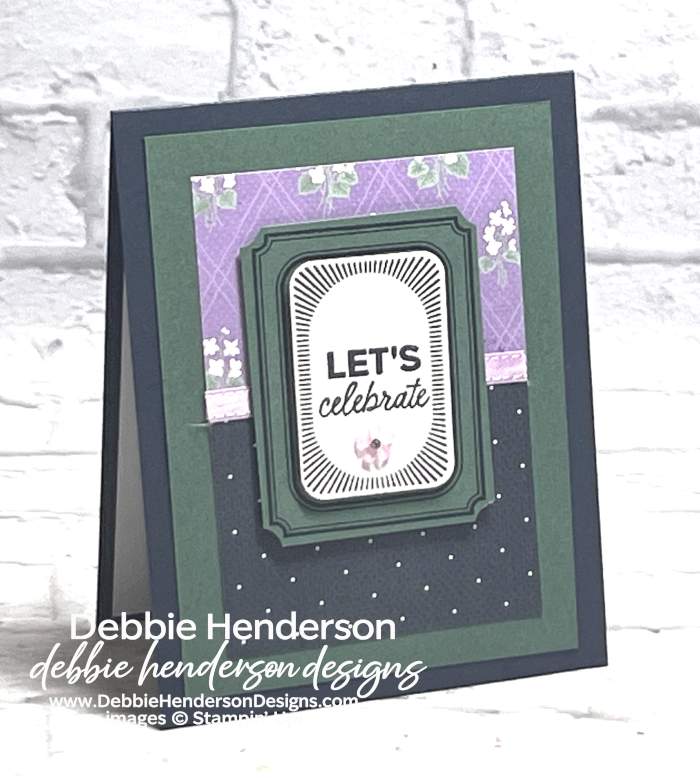
I chose to use the Exciting Times Bundle for my Creatively Simple card today and created a “Clean & Simple” look with several layers of cardstock and designer paper:
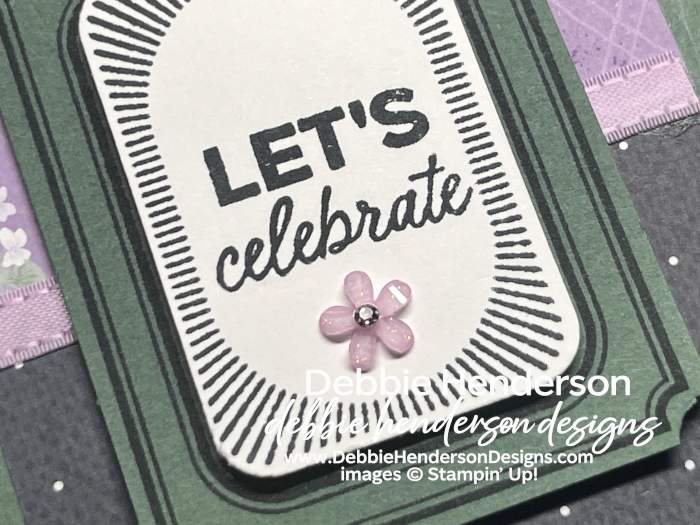
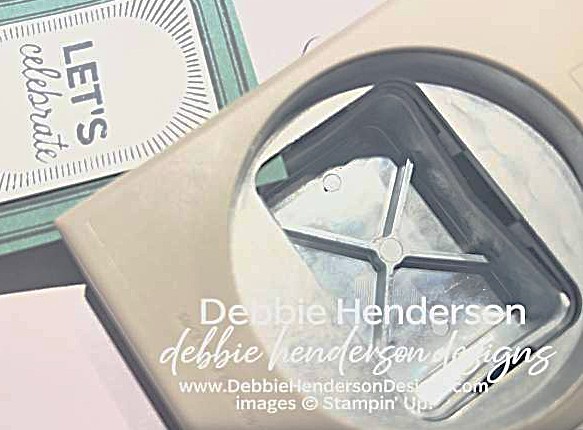
The sentiment is layered over a stamped and cut label shape and I’ll show you a tip about cutting the corners around the stamped frame:
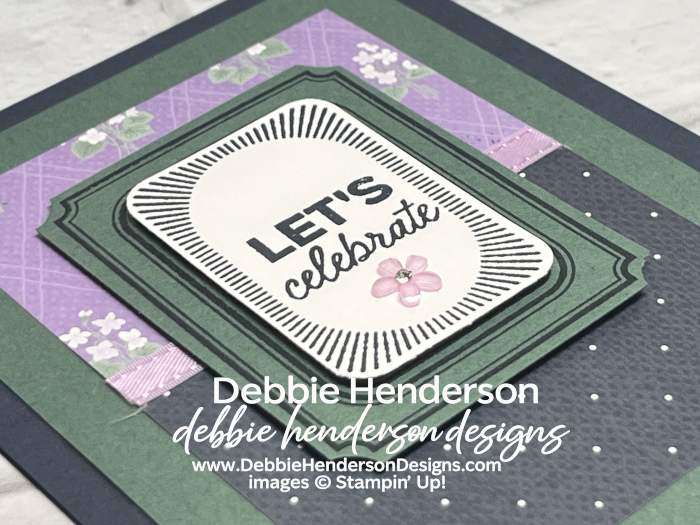
Stampin’ Up! Products Used:

  • Stamps: Exciting Times
  • Inks: Secret Sea
  • Cardstock: Secret Sea, Peaceful Pine, Basic White
  • Designer Paper: Violet Dreams
  • Tools & Accessories: Rounded Rectangular Punch, Fresh Freesia Satin Ribbon, Adhesive-Backed Blooms, Stampin’ Dimensionals

Card Recipe:

  • Card Base: Secret Sea Cardstock 11 x 4-1/4. Score and fold at 5-1/2.
  • Layer 2: Peaceful Pine Cardstock 5 x 3-3/4. Glue to card base.
  • Layer 3: Violet Dreams Designer Paper 4-1/4 x 3. Cut on the long side at 2-1/4 and flip one piece to the opposite print side. Glue together to card front.
  • Ribbon: Glue a piece of ribbon over the two designer paper layers where they meet.
  • Frame: Stamp the frame image on Peaceful Pine Cardstock 2-7/8 x 2-1/4 with Secret Sea Ink. Flip the punch over so you can see the back. Insert each corner on the rounded end of the punch to create 4 cuts like this:
  • Glue frame to card front with Stampin’ Dimensionals.
  • Sentiment: Stamp the sentiment and frame on Basic White Cardstock with Secret Sea Ink. Cut with the punch. Glue over the frame layer with Stampin’ Dimensionals.
  • Bling: Add Adhesive-Backed Blooms below the sentiment.

Make sure you visit Create With Stamping Friends to see what Connie created for our team this week and visit our tutorial page to see our latest collections.
Print Friendly, PDF & Email

Filed Under: Create With Stamping Friends

Contact Me!

Reader Interactions

Leave a Reply Cancel reply

Your email address will not be published. Required fields are marked *

Primary Sidebar

Debbie Henderson

Debbie Henderson

Stampin' Up! Demonstrator
Contact Me!

Shop My Online Store
  • Facebook
  • Instagram
  • Pinterest
  • YouTube

My 15 Year Anniversary Stampin’ Up! 2024

My 15 Year Anniversary Stampin’ Up! 2024

Stampin’ Up! Newest Mini Catalog!

Stampin' Up! Catalog

Click here to subscribe to Paper Pumpkin

Click here to subscribe to Paper Pumpkin

Online Exclusives

Online Exclusives

Create With Stamping Friends Latest Tutorial Collection!

Create With Stamping Friends Latest Tutorial Collection!

Check out all of our Create With Stamping Friends Tutorial Collections.

Search My Blog

I am a Designer for Create with Stamping Friends Saturday Blog Hops

I am a Designer for Create with Stamping Friends Saturday Blog Hops

I am a Designer for the Create With Stamping Friends Thursday Challenge Team

2022 Incentive Trip to Norway Achiever!

2021 Incentive Trip Achiever!

2020 Incentive Trip Achiever!

2019 Incentive Trip Achiever!

2018 Incentive Trip Achiever!

2017 Incentive Trip Achiever!

2014 Incentive Trip Achiever!

Archives

Categories

Disclaimer

The content of this site is the sole responsibility and opinions of Debbie Henderson as an Independent Stampin' Up! Demonstrator and the use of its content, classes, services, and/or products offered is not endorsed by Stampin' Up! Stamped images are copyright Stampin' Up!

Images Copyright Stampin' Up! No affiliation with Stampin' Up! is involved or implied. Genesis for Wordpress Hosted by WebsByAmy.