Use Your Stash Theme!
Welcome to our Saturday Blog Hop at Create With Stamping Friends. Take a look around your stamp room, craft room or studio. Do you see some unfinished projects or pieces? I’m sure we all do. This week’s theme for our blog hop is “Use Your Stash”!
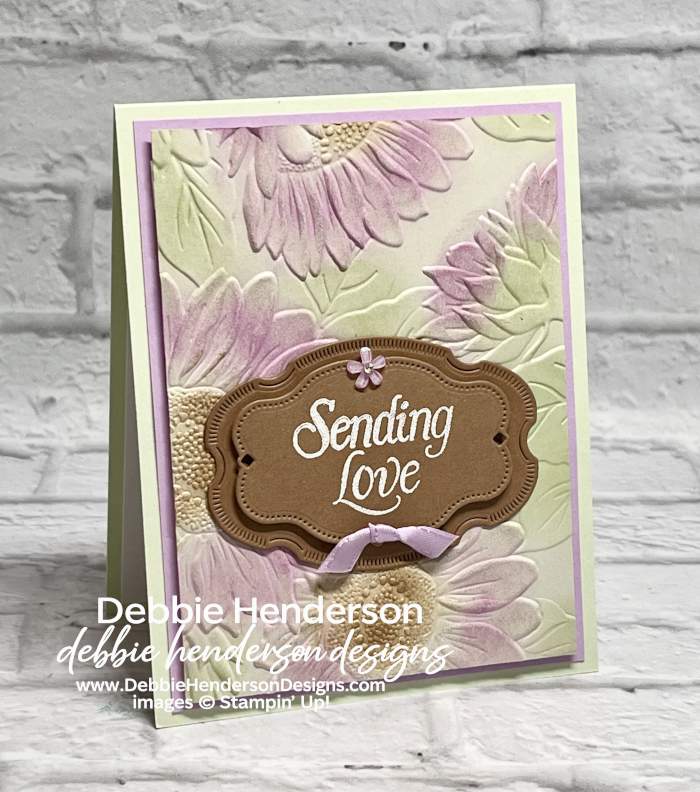
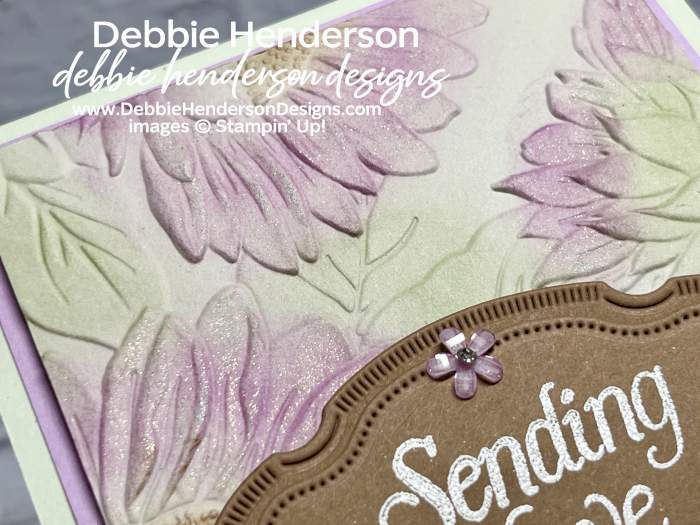
Quite a few months ago, I showed members of my Facebook group different ways to use the Sunflower 3D Embossing Folder. All of the samples I showed them have been sitting on my counter unused, so that’s what I’m using today. For the embossed layer, I used the embossing folder and then added ink color to the embossed “bumps” with a Mini Blending Brush. You’ll see Pecan Pie, Fresh Freesia and Soft Sea Foam Inks. Once all of the ink color had been applied, I added Clear Wink Of Stella over the petals that you can see in these photos below:
Stampin’ Up! Products Used:
- Stamps: Framed Violets
- Inks: VersaMark, Fresh Freesia, Pecan Pie, Soft Sea Foam
- Cardstock: Soft Sea Foam, Fresh Freesia, Pecan Pie, Basic Beige
- Tools & Accessories: Sweet Words & Labels Dies, Sunflower 3D Embossing Folder, Fresh Freesia Satin Ribbon, Adhesive-Backed Blooms, Blending Brush, Heat Tool, Basics Embossing Powders, Foam Adhesive Sheets, Stampin’ Dimensionals
Card Recipe:
- Card Base: Soft Sea Foam Cardstock 11 x 4-1/4. Score and fold at 5-1/2.
- Layer 2: Fresh Freesia Cardstock 5-1/4 x 4. Glue to card base.
- Layer 3: Basic Beige Cardstock 5 x 3-3/4, follow these steps:
- Emboss with the Sunflower 3D Embossing Folder.
- Use a Mini Blending Brush to add Pecan Pie Ink to the center of each sunflower. Brush lightly.
- Use a Mini Blending Brush to add Fresh Freesia Ink to the flower petals. Brush lightly.
- Use a Mini Blending Brush to add Soft Sea Foam Ink to the leaves. Brush lightly.
- Color the petals with Clear Wink Of Stella.
- Glue to card front with Foam Adhesive Sheets.
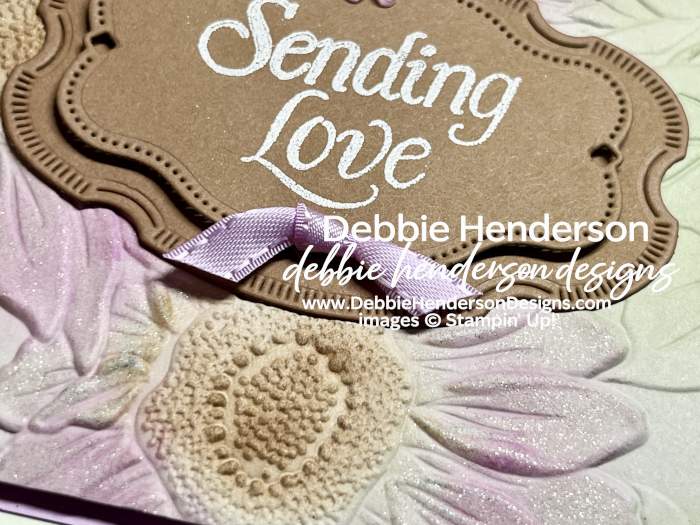
- Layer 4: Cut the 3-1/8″ long label shape die with Pecan Pie Cardstock. Glue to card front flat.
- Layer 5: Stamp the sentiment on Pecan Pie Cardstock with VersaMark Ink. Sprinkle with white embossing powder. Melt the powder with the Heat Tool. Cut with the 2-5/8″ long label shape die. Glue over the first label with Stampin’ Dimensionals.
- Ribbon: Tie the ribbon into a knot and glue below the sentiment.
- Bling: Add an Adhesive-Backed Blooms above the sentiment.
Now you can follow the rest of the Saturday Blog Hop by clicking on the links below to visit my talented teammates! Click BACK to visit the Create With Stamping Friends Blog and NEXT to visit Lori de Groot:
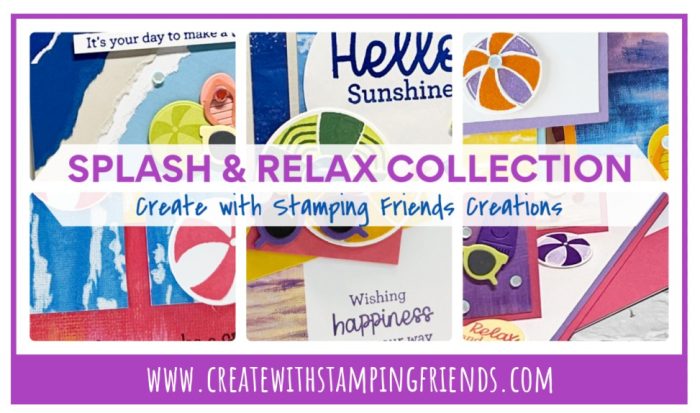
Check out our newest tutorial Collection at Create With Stamping Friends:

Leave a Reply