Animal Kingdom Theme!

Welcome to our Saturday Blog Hop at Create With Stamping Friends. Who doesn’t love animals right? That’s our theme this week and because I didn’t have any current stamp sets with animals, I created my own with some Punch Art!
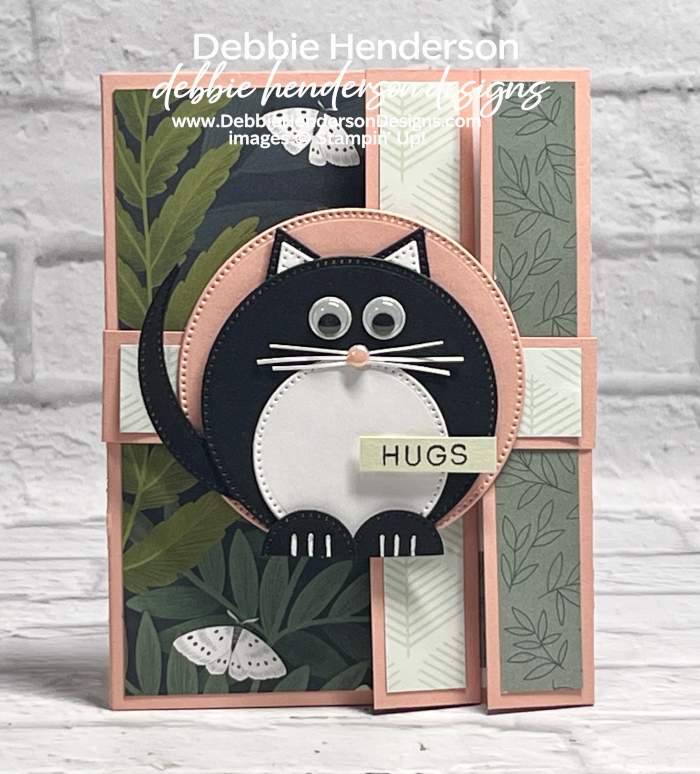
I have a kitty named Ozzie and I replicated his black and white colors. I used the Stylish Shapes Dies for all of my layers. I also created a Fancy Card Fold for the punch art to sit on by wrapping a Belly Band around the card:
Stampin’ Up! Products Used:
- Stamps: Scalloped Blooms
- Inks: Basic Black
- Cardstock:Crisp Cantaloupe, Basic Black, Basic White
- Designer Paper: Moonlit Flora
- Tools & Accessories: Stylish Shapes Dies, 2026-2028 In Color Dots, Stampin’ Dimensionals, Paper Snips
- Misc: Googly Eyes
Card Recipe:
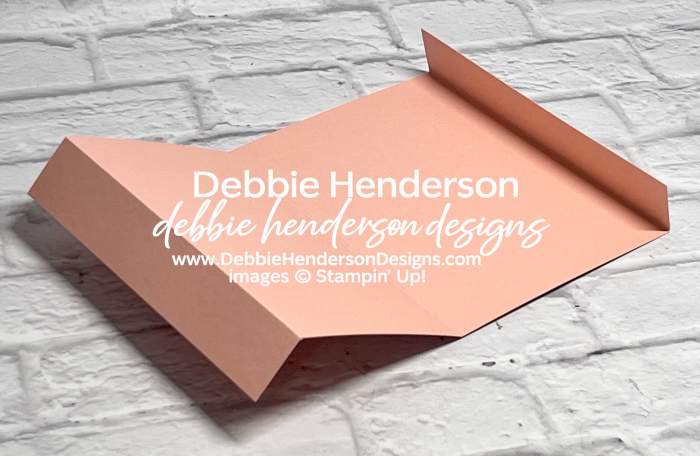
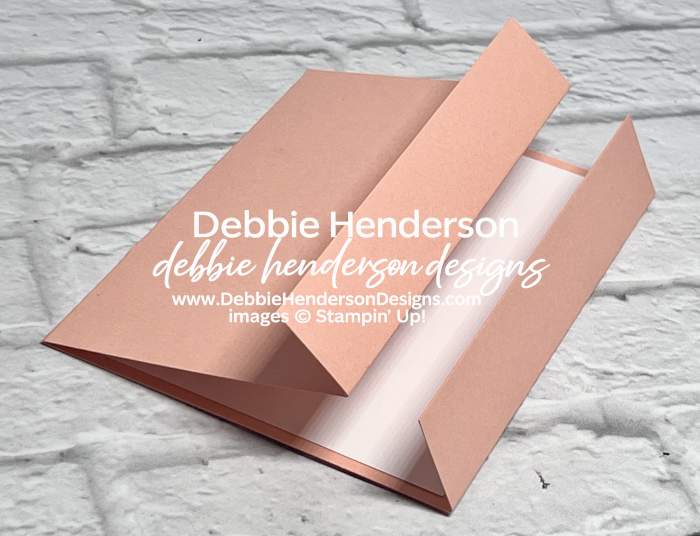
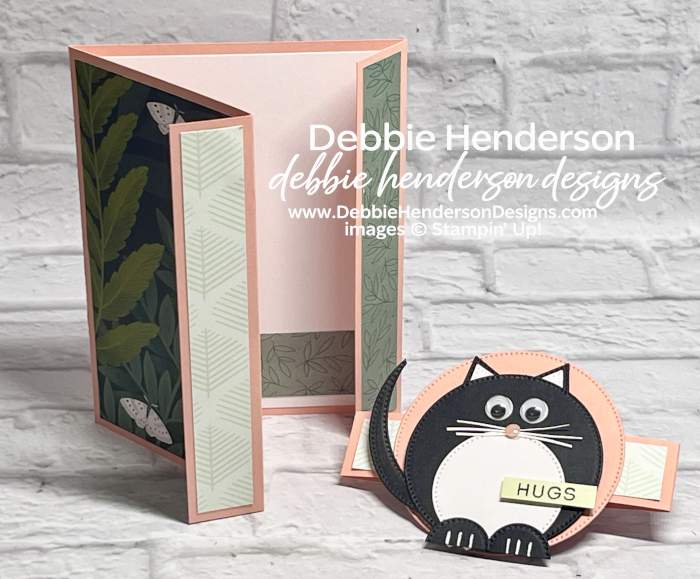
- Card Base: Crisp Cantaloupe Cardstock 9-1/2 x 5-1/2. Score at 1, 4-1/4 and 8-1/2. Fold on all score lines. The two flaps on each fold fold in the same direction
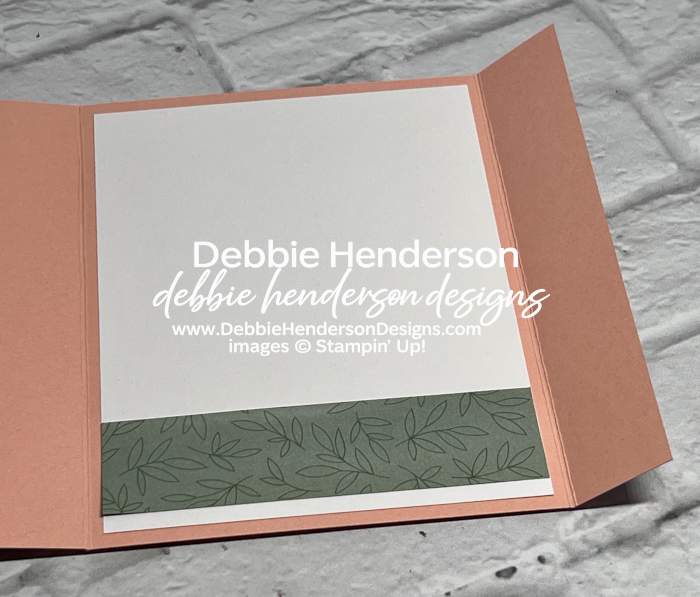
- Layer 2: Basic White Cardstock 5-1/4 x 4. Glue to the inside of the card base.
- Designer Paper: Moonlit Flora Designer Paper 4 x 1. Glue to white layer 1/8″ from the bottom.
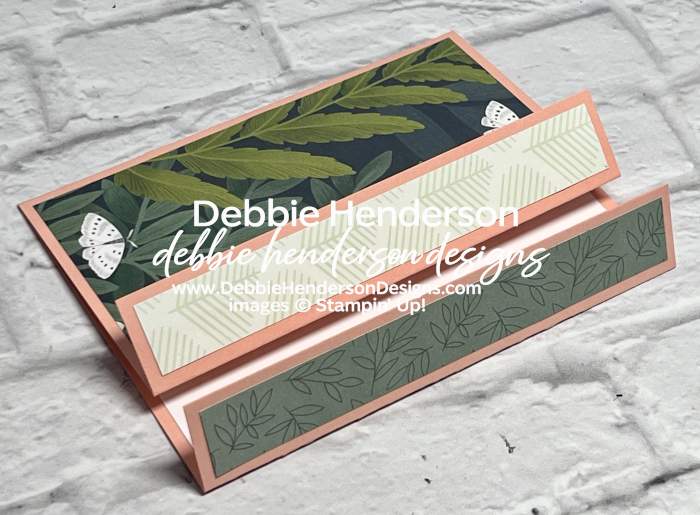

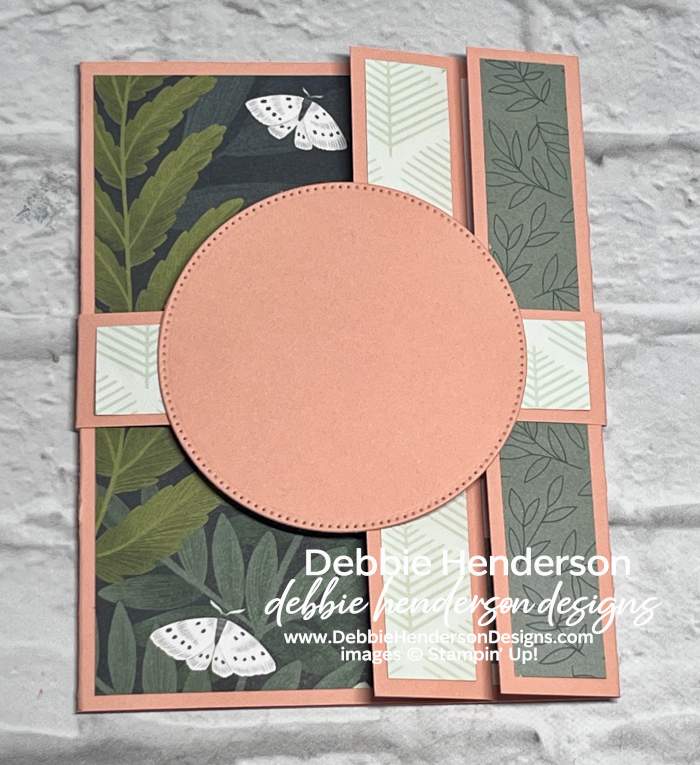
- Designer Paper Flap Layers: Moonlit Flora Designer Paper, two patterns 5-1/4 x 3/4. Glue to each flap.
- Designer Paper 2: Moonlit Flora Designer Paper 5-1/4 x 3. Glue to the largest section on the card base front.
- Belly Band Layer 1: Crisp Cantaloups Cardstock 11 x 1. Wrap around the card base loosely and press down where the card edges are to wrap around the whole card. Glue ends overlapping each other and trim to fit.
- Belly Band Layer 2: Moonlit Flora Designer Paper 4 x 1. Glue to belly band front.
- Belly Band Layer 3: Crisp Cantaloupe Cardstock cut with the 3″ circle from the Stylish Shapes Dies. Glue to belly band.
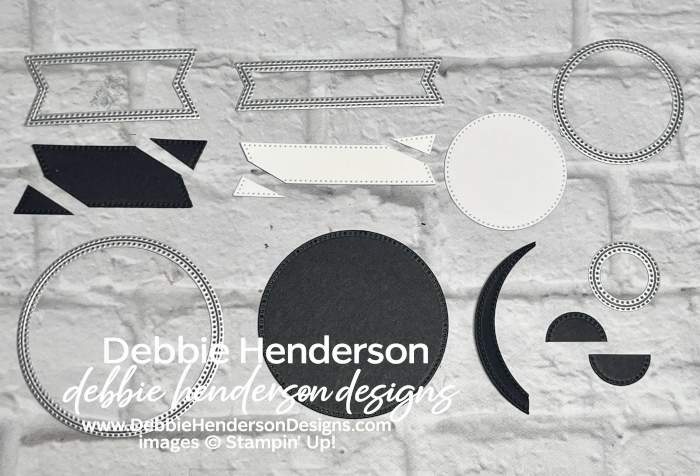
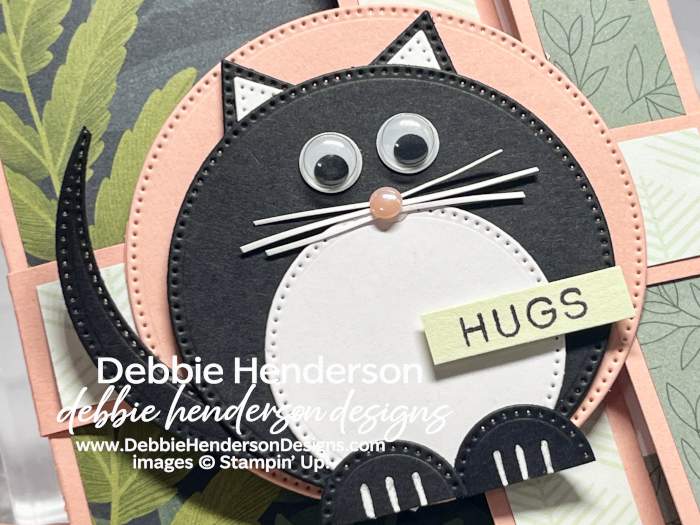
You will need the following layers for the kitty using the Stylish Shapes Dies. Cut each one as shown and glue the pieces together to form the cat shape:
- Fat Banner Die with Basic Black Cardstock. Cut off two corners to use for the ears.
- Skinny Banner Die with Basic White Cardstock. Cut off two corners to use for the ears layer. Glue to the black layers.
- 2-1/2″ circle die with Basic Black Cardstock to use for the body.
- 1-5/8″ circle die with Basic White Cardstock to layer over the body, even at the bottom.
- 2-1/2″ circle die with Basic Black Cardstock to use for the tail. Use the die a 2nd time to cut a sliver off of the circle for the tail shape.
- 3/4″ circle die with Basic Black Cardstock to use for paws. Cut in half and use a White Gel Pen to add claw lines. Glue with Stampin’ Dimensionals.
- Glue to belly band with Stampin’ Dimensionals.
- Sentiment: Soft Sea Foam Cardstock stamped with Basic Black Ink. Trim close to the wording and glue over the cat with Mini Stampin’ Dimensionals.
You will also need googly eyes, whiskers cut with Paper Snips very thin with Basic White Cardstock and add a nose with the 2026-2028 In Color Dots over the whiskers.
Now you can follow the rest of the Saturday Blog Hop by clicking on the links below to visit my talented teammates! Click BACK to visit the Create With Stamping Friends Blog and NEXT to visit Lori de Groot:


Check out our newest tutorial Collection at Create With Stamping Friends:


So clever!
VERY cute card! Thanks for sharing your tips on how to use dies to create this (also) fun-fold!!!
Debbie, this is sooooo adorable!!!!
So cute and clever!
What a cute card! Love how you created the cat!
Omgoodness, I just love this card. Thank you for sharing. I’m going to CASE it but give you full credit. Have a blessed day!
So happy you love it enough to copy!