Christmas Tags Theme!

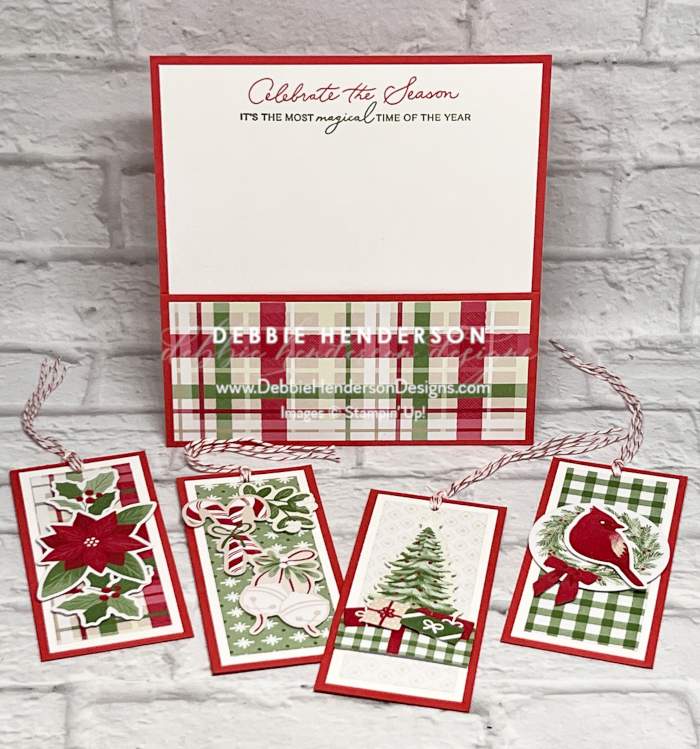
Welcome to our Saturday Blog Hop at Create With Stamping Friends. Our theme this week is Christmas Tags. As I was thinking about the design of my tags, I thought I would add a pocket tag holder too!

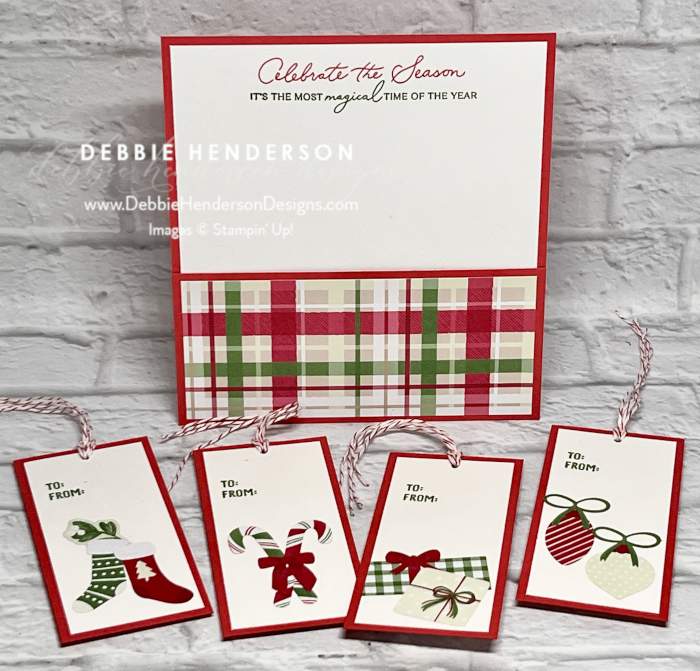
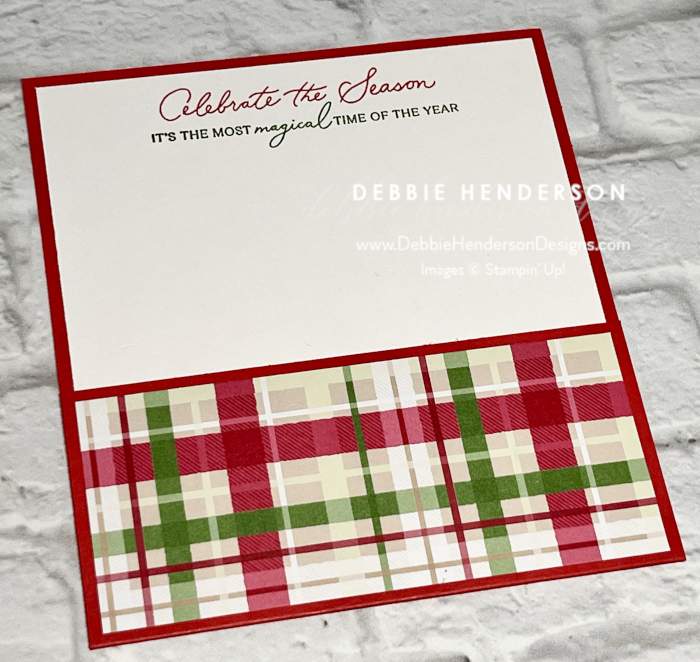
The Christmas Tags & More Designer Paper was absolutely perfect for my project this week. You can see with the two photos below how I created each tag and flipped them over to the backside where you can write on the white space:
Stampin’ Up! Products Used:
- Stamps: Delicate Pines, Festive Friends
- Inks: Real Red, Garden Green
- Cardstock: Real Red Basic White
- Designer Paper: Christmas Tags & More
- Tools & Accessories: Real Red & White Baker’s Twine, Tear & Tape, Stampin’ Dimensionals, 1/4″ handheld punch
Tag Pocket Recipe:
- Pocket Base: Real Red Cardstock 8-1/2 x 5-1/2. Score at 2-1/2.
- Layer 2: Basic White Cardstock 5-3/4 x 5-1/4. Glue to the largest scored section. Add Tear & Tape to the 2 short ends of the shortest score section, fold on score line and press the sides in place over the Tear & Tape to form the pocket.
- Layer 3: Christmas Tags & More Designer Paper 5-1/4 x 2-1/4. Glue to pocket front.
- Stamp the sentments at the top on the white layer: Large sentiment with Real Red Ink and smaller sentiment with Garden Green Ink.

Tags Recipe:
- Tag Base: For each tag-Real Red Cardstock 4-1/4 x 2. Cut 4.
- Layer 2: For each tag-Basic White Cardstock 4 x 1-3/4. Cut 8 and glue to front and back of each tag base.
- Layer 3: Add the following to each individual tag-
- Tree Tag:
- Christmas Tags & More Designer Paper 3-3/4 x 1-1/2. Glue to white layer.
- Christmas Tags & More Designer Paper 1-3/4 x 3/4. Glue to tag 3/4″ from the bottom with Stampin’ Dimensionals.
- Tuck and glue the preprinted diecut Christmas Tree under the designer paper with Stampin’ Dimensionals.
- Add 4 preprinted diecut presents under the tree.
- Stamp the To & From on the back with Garden Green Ink.
- Glue 2 large preprinted diecut presents to the bottom on the back.
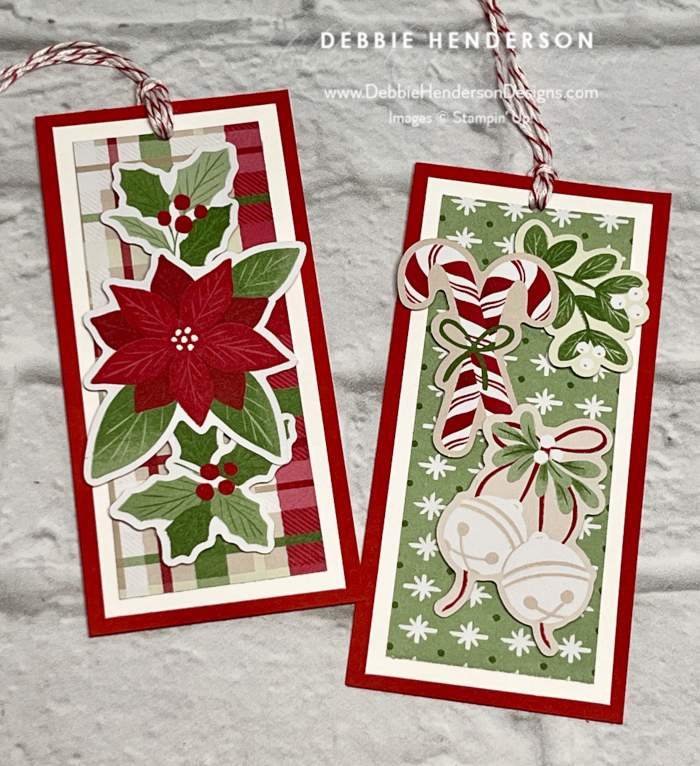
- Cardinal Tag:
- Christmas Tags & More designer Paper 3-3/4 x 1-1/2. Glue to white layer.
- Glue the preprinted diecut wreath with Stampin’ Dimensionals.
- Glue the preprinted diecut cardinal in the center of the wreath with Stampin’ Dimensionals.
- Glue a bow at the bottom left on the wreath.
- Stamp the To & From on the back with Garden Green Ink.
- Glue 2 preprinted diecut ornaments to the bottom on the back and glue two green bows at the top of each ornament.
- Poinsettia Tag:
- Christmas Tags & More designer Paper 3-3/4 x 1-1/2. Glue to white layer.
- Glue one large poinsettia flower in the center with Stampin’ Dimensionals.
- Glue one preprinted holly leaf diecut tucked under the top of the flower and a 2nd preprinted holly leaf diecut under the bottom of the flower, both with Stampin’ Dimensionals.
- Stamp the To & From on the back with Garden Green Ink.
- Glue 2 preprinted diecut stockings to the bottom on the back and tuck a small preprinted flower at the top tucked under the stockings.
- Candy Cane Tag:
- Christmas Tags & More designer Paper 3-3/4 x 1-1/2. Glue to white layer.
- Glue one set of preprinted candy canes, jingle bells and flower to the designer paper with Stampin’ Dimensionals.
- Stamp the To & From on the back with Garden Green Ink.
- Glue 2 preprinted diecut candy canes to the bottom on the back and glue a red bow to the candy canes.
- For each tag, use the handheld punch to add a hole to the top.
- For each tag, cut 2 pieces of the twine 5″ long and loop both pieces of twine through the holes and tie off.
- Tuck the tags into the pocket!
- Tree Tag:
Now you can follow the rest of the Saturday Blog Hop by clicking on the links below to visit my talented teammates! Click BACK to visit the Create With Stamping Friends Blog and NEXT to visit Lori de Groot:


Check out our newest tutorial Collection at Create With Stamping Friends:


Leave a Reply