Christmas In July Red & Green Theme!

Welcome to our Saturday Blog Hop at Create With Stamping Friends. It’s Christmas in July this week for our blog hop! It’s never too early to start making Christmas cards so you won’t be stressed by the time December arrives.
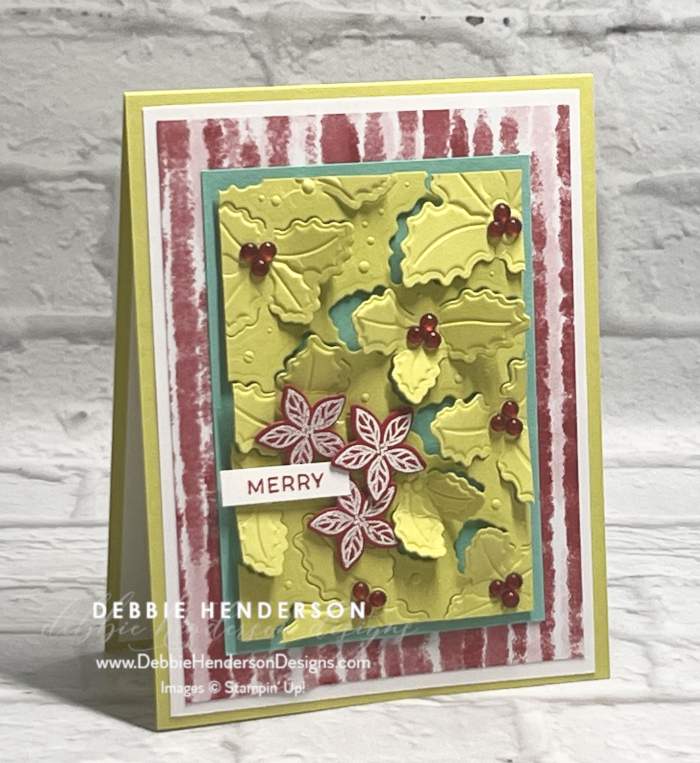
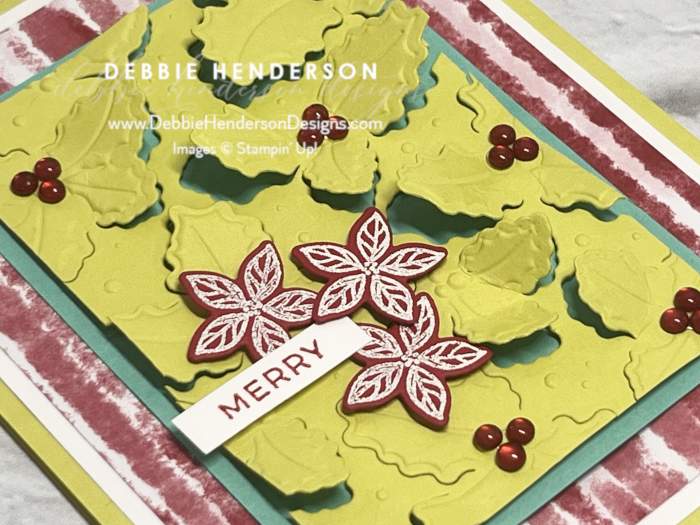
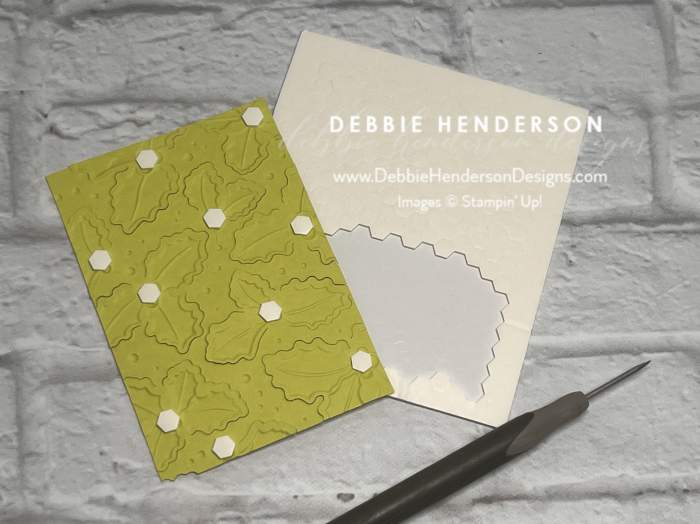
I used a new bundle called Jolly Holly and I just love the large holly leaves die. The die partially cuts the holly leaves so you can bend them forward like you see in these photos:
Stampin’ Up! Products Used:
- Stamps: Jolly Holly
- Inks: Read Red, VersaMark
- Cardstock: Lemon Lime Twist, Shy Shamrock, Real Red, Basic White
- Designer Paper: Regals
- Tools & Accessories: Jolly Holly Dies, Mini Stampin’ Dimensionals, Heat Tool, Basics Embossing Powder, Cherry Cobbler & Pearl Adhesive-Backed Berries
Card Recipe:
- Card Base: Lemon Lime Twist Cardstock 11 x 4-1/4. Score and fold at 5-1/2.
- Layer 2: Basic White Cardstock 5-1/4 x 4. Glue to card base.
- Layer 3: Regals Designer Paper 5 x 3-3/4. Glue to card front.
- Layer 4: Shy Shamrock Cardstock 4-1/4 x 3. Glue to card front.
- Layer 5: Lemon Lime Twist Cardstock 4 x 2-3/4. Cut & Emboss with the Jolly Holly Dies & Hybrid Embossing Folder. Add Mini Stampin’ Dimensionals over the holly berries on the backside of the cardstock and glue to card front:
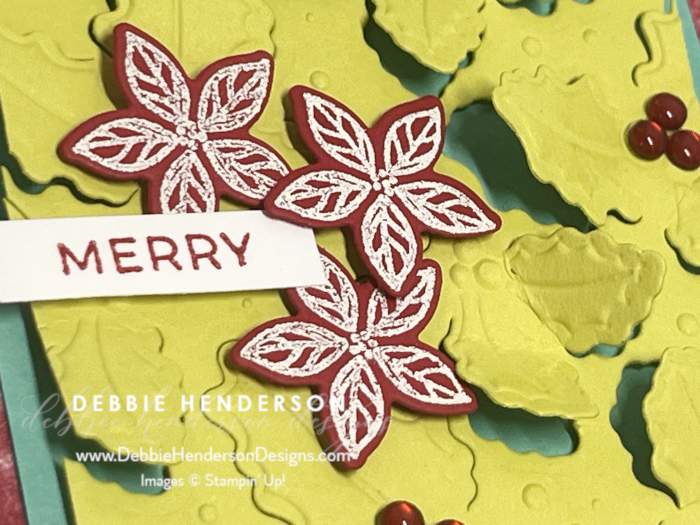
- Sentiment: Stamp the sentiment with Real Red Ink on Basic White Cardstock 1-1/4 x 1/4. Glue to holly layer with Mini Stampin’ Dimensionals.
- Flowers: Stamp 3 flowers on Real Red Cardstock with VersaMark Ink. Cut with the die. Glue around the sentiment with Mini Stampin’ Dimensionals.
- Bling: Add Cherry Cobbler & Pearl Adhesive-Backed Berries to each embossed holly leaf centers.
Now you can follow the rest of the Saturday Blog Hop by clicking on the links below to visit my talented teammates! Click BACK to visit the Create With Stamping Friends Blog and NEXT to visit Lori de Groot:


Check out our newest tutorial Collection at Create With Stamping Friends:


Leave a Reply