Celebrating Sale-A-Bration!

Happy Saturday and welcome to a blog hop from the Create With Connie & Mary team! I love creating for our team each week. We have such a great group of designers. This week we are all using our favorite non-stamp product and mine is the Brilliant Rainbow Dies.
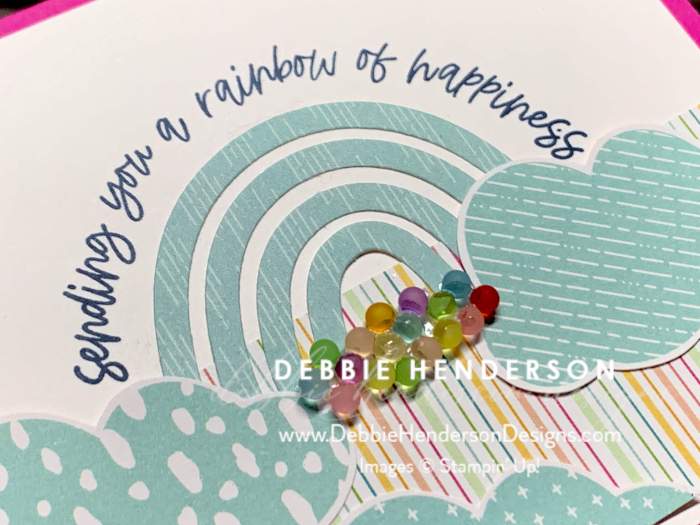
I started out with the card you see on the top and I was saddened to have to throw away the rainbow pieces that I cut out with the dies, so I turned them into a second card. You know us papercrafters, we hate to throw stuff away!

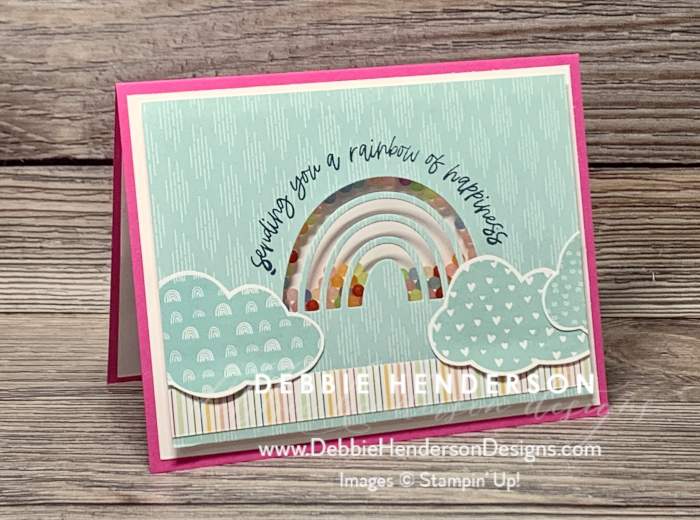
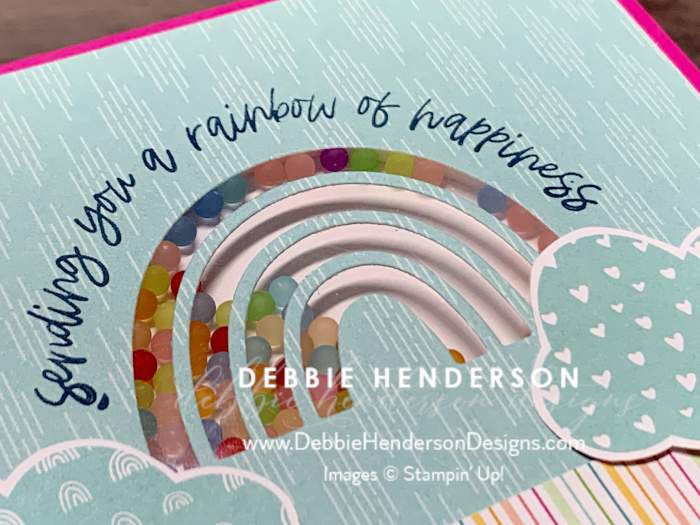
The first card I created is a Shaker Card. I love our brand new Frosted Beads Assortment that I used. The colors are perfect for a rainbow card. You can see what I mean in these photos:
Next, I added the same embellishments to the front of card #2 under the rainbow. I glued them in place using liquid glue. Once dry, I poured some of our Fine Tip Glue Pen in-between the beads to glue them to each other so they wouldn’t fall off. You can’t even tell that I did that!

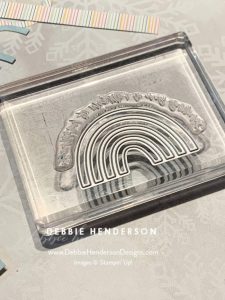
TIP:
Here’s an easy way to line up the sentiment above the dies. Place the die on a clear block cut side up.
Position the sentiment above the die and shape accordingly.
Remove die and stamp!
Want to create one of these cards or both? Here are the steps:
Card #1:
- Card Base: Magenta Madness Cardstock 8-1/2″ x 5-1/2″. Score and fold at 4-1/4″.
- Layer #2: Basic White Cardstock 5-1/4″ x 4″/ Glue to card base.
- Layer #3: Sunshine & Rainbows Designer Paper 5″ x 3-3/4″. Cut the rainbow shape with the die. Keep the cut-outs for card #2. Stamp the sentiment above the rainbow using Misty Moonlight Ink. Set aside (Use tip shown above).
- Layer #4: Window Sheet 4-3/4″ x 3-1/2″. Glue to the back of the rainbow cut-out. Add Foam Adhesive Strips around the rainbow cut-out on the window sheet. Place a small amount of the Frosted Beads Assortment inside the die-cut area. Peel the strips off of the Foam Adhesive Strips and press a Basic White Cardstock piece over the foam that measures 3-1/2″ x 2-1/2″. Glue layer to card front using pieces of Foam Adhesive Sheets so the height is the same as the strips.
- Layer #5: Sunshine & Rainbows Designer Paper 5″ x 1/2″. Glue about 1/4″ from the bottom of the designer paper layer.
- Clouds: Use the Cloud Punch to punch the printed clouds from the designer paper sheet. Glue to card front.
Card #2:
- Card Base: Magenta Madness Cardstock 8-1/2″ x 5-1/2″. Score and fold at 4-1/4″.
- Layer #2: Basic White Cardstock 5-1/4″ x 4″/ Glue to card base.
- Layer #3: Sunshine & Rainbows Designer Paper 5-1/4″ x 1-3/4″. Glue about 1/4″ from the bottom of the white layer.
- Rainbow: Glue the rainbow strips cut from card #3 to the center of the card.
- Sentiment: Stamp the sentiment above the rainbow using Misty Moonlight Ink.
- Clouds: Use the Cloud Punch to punch the printed clouds from the designer paper sheet. Glue to card front.
- Bling: Add liquid glue below the rainbow and press some of the Frosted Beads Assortment. Allow to dry and add adhesive over the beads using the Fine Tip Glue Pen.
Now you can follow the rest of the Saturday Blog Hop
by clicking on the links below to visit my talented teammates!
Click PREVIOUS to visit Libby and NEXT to visit Melissa:


Both cards are lovely! I agree, it makes sense to use the cut-out pieces for another project. Thanks for sharing!
Thank you Alicia!