Welcome to new designers for our team of 8!

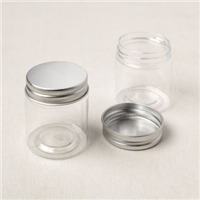
Welcome to 3D Thursday! Did you miss us? Our team took a month off so that we could regroup and we have added some new team members. To debut our new team we are hosting a Team Blog Hop so you can meet everyone! We are all featuring the Mini Jam Jars and this is what I came up with:

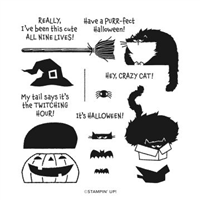
We have some super neat Halloween products in our Mini Catalog and I chose to decorate mine as a Halloween Treat Holder using the Clever Cats stamp set. The cat images in this set crack me up. You can follow these steps below to create the scenery on top of the lid just like I did on mine:


- Step 1: Cut a piece of Basic White Cardstock to measure 2-3/4″ x 3/4″. Score on the long side at 3/4″, 1-1/4″, 2″ and 2-1/2″.
- Step 2: Fold on all score lines. Add adhesive to the smallest tab on the end and press the other end over the flap to create a square as shown in Photo 2.
- Step 3: Stamp the cat image using Tuxedo Black Memento Ink. Hand-cut with Paper Snips. Glue the square to the back of the cat, even with the flat edge on the bottom of the cat.


- Step 4: Cut a 2″ circle using the Layering Circles Dies and the Cute Halloween Designer Paper. Glue to the top of the jar lid.
- Step 5: Add adhesive to the bottom of the square box glued to the cat. Press in place on top of the lid.
- Step 6: Stamp the pumpkin image using Calypso Coral Ink on Calypso Coral Cardstock. Hand-cut with Paper Snips. Glue to the back of the square on the cat, lining up the pumpkin so it sits on the lid flat.
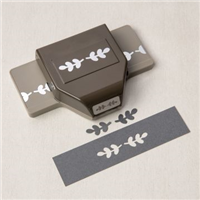
- Step 7: Cut (2) stems using the Symmetrical Stems Border Punch and the Black Glitter Paper. Tuck and glue under the cat on the lid.
- Step 8: Cut a piece of the Cute Halloween Designer Paper to measure 6″ x 1-1/2″. Glue around the body of the Mini Jam Jar using Tear & Tape.
- Step 9: Wrap the Black Glitter Organdy Ribbon around the bottom of the designer paper and tie into a bow. Add a few Mini Glue Dots near the knot to hold the ribbon in place.
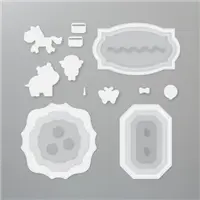
- Step 10: Cut the shape of the sentiment layer using Basic White Cardstock and the Hippo & Friends Dies. Stamp the sentiment using Calypso Coral Ink. Glue to jar front using Stampin’ Dimensionals.
- Step 11: Stamp (2) bat images using Tuxedo Black Memento Ink and hand-cut with Paper Snips. Glue the two bats to the sentiment.
You can now hop over the Darla Watson from Scrap Happens Here to see what she created for you today. I know you will love her project and all of the projects created by my teammates! Make sure you visit all of my teammates. Next week we go back to our regular schedule and will have one designer per week!


Great project, Debbie! I love that you created a little scene with such dimension-very fun technique! The cats crack me up, too! 😀
I agree Sherri, the cats crack me up too!
The stand up element to this makes it soo fun! I love those clever cats!
Thanks Jennifer and so glad to have you on the team!
Darling project Debbie! Another fun gift idea for those trick or treaters!!
Thank you Darla!
What darling treat holders everyone of you made..oh yeah, I hopped all around looking and now going around again to leave comments and download some ODF’s.
I did not realize we can still order those cute jam jars…they made great treat holders!!
Love your black cat and pumpkin jar lid!
Glad you visited with everyone Karen, thanks!
Super Cute project Debbie
Thanks Rick and I loved your project as well!
Thanks Rick!
Your treat jar is adorable. Love the crazy cat!
Hugs
Thanks so much Paula. The jars are really fun to decorate!
Love it Debbie! Such a super cute little Halloween project. The cat is simply adorable sitting on top of the jar.
Thank you Twila!