Four Techniques With The Sunflower Embossing Folder!
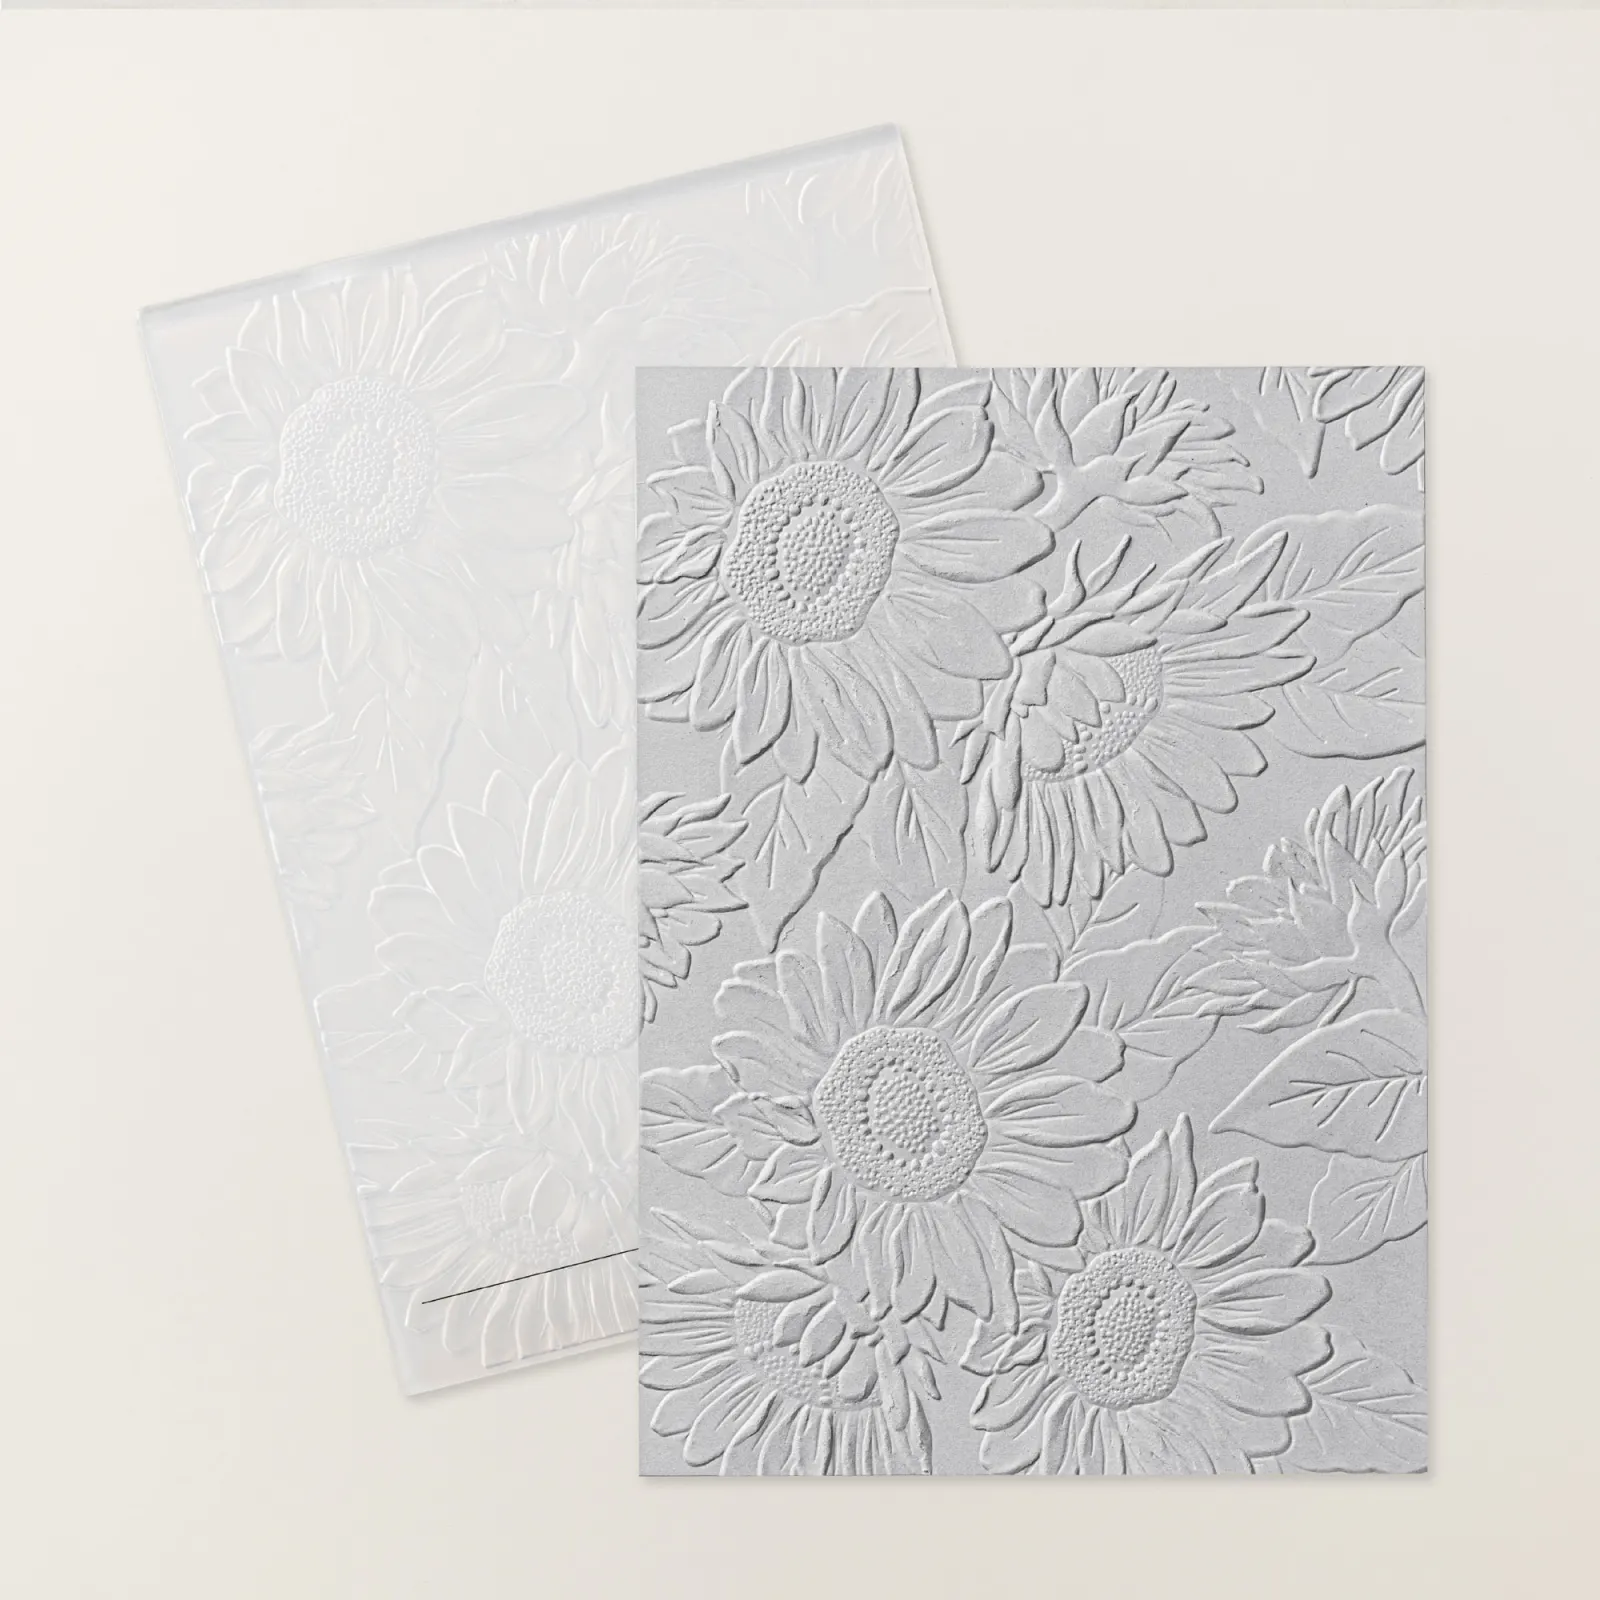
Our Sunflower 3D Embossing Folder is one of the deepest dry embossing folders I think I have ever seen. And because the embossing is so deep, you can add so much by using these techniques:
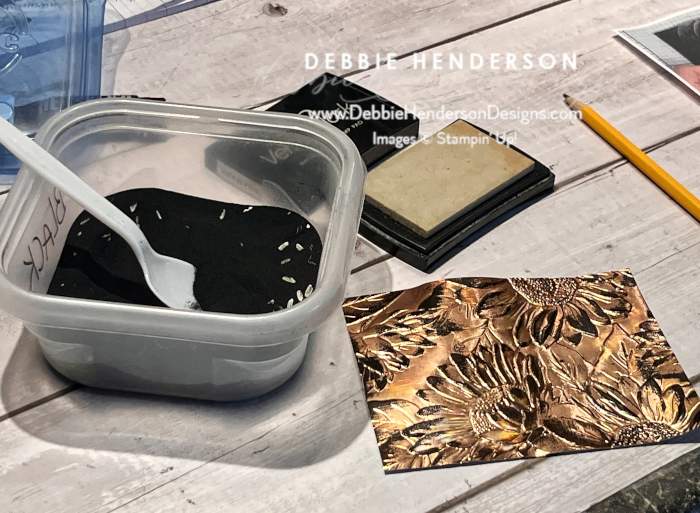
Embossing Powders:
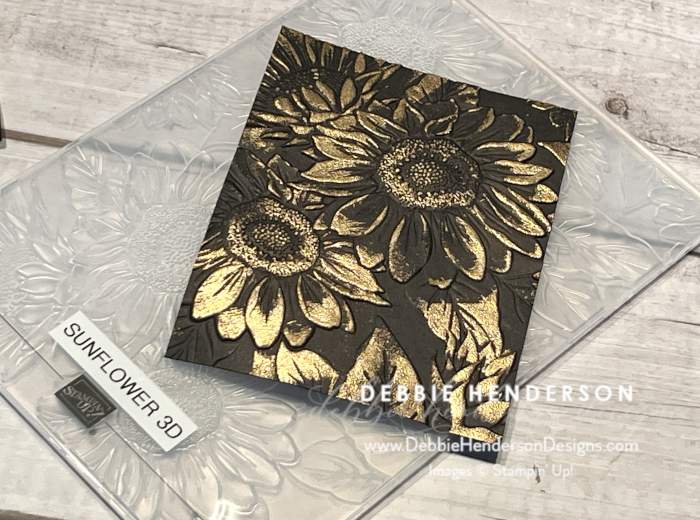
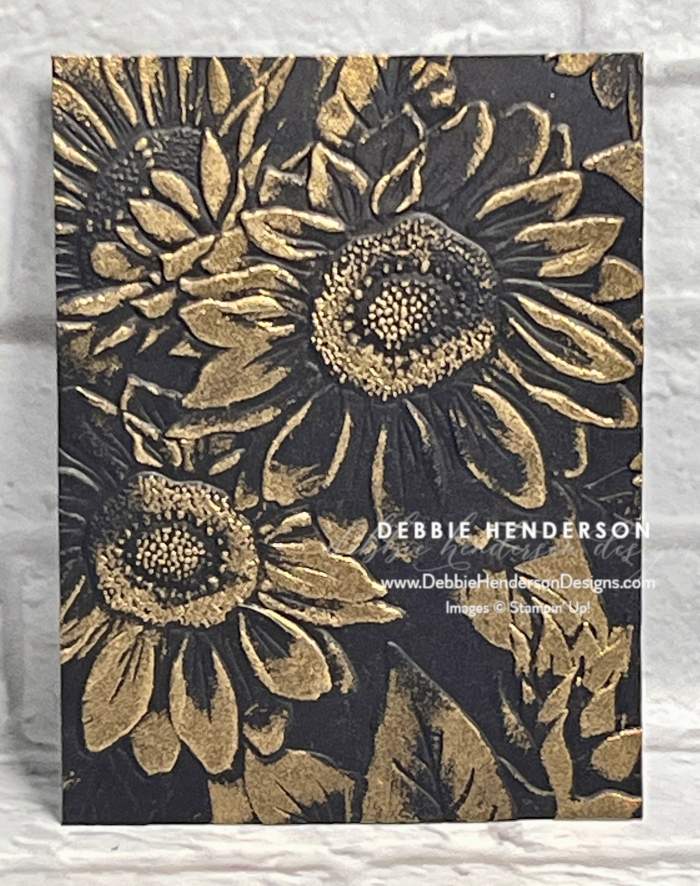
This is what I used:
- Sunflower 3D Embossing Folder
- Gold Embossing Powder
- Heat Tool
- VersaMark Ink
- Basic Black Cardstock
Emboss the cardstock first with the embossing folder. Swipe the ink pad upside-down over the embossing bumps lightly. Sprinkle gold embossing powder and melt with the heat tool.
Blending Brushes & Wink Of Stella Clear Glitter Brush:
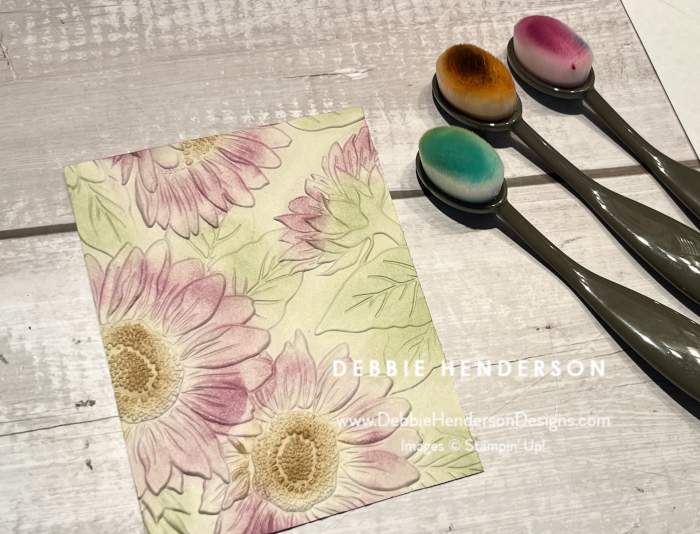
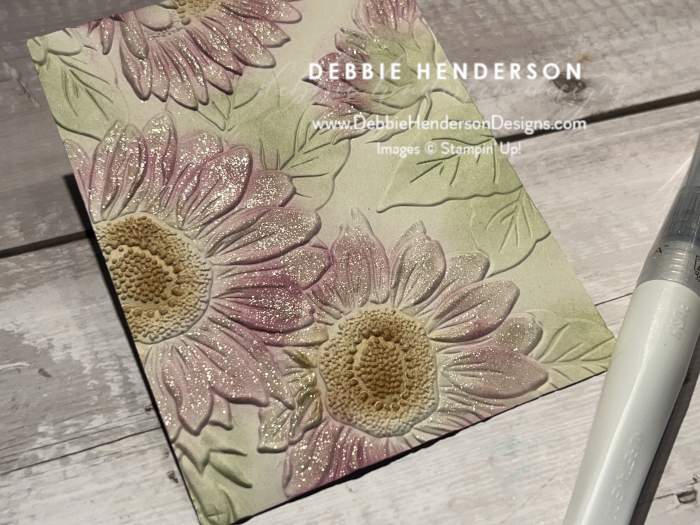
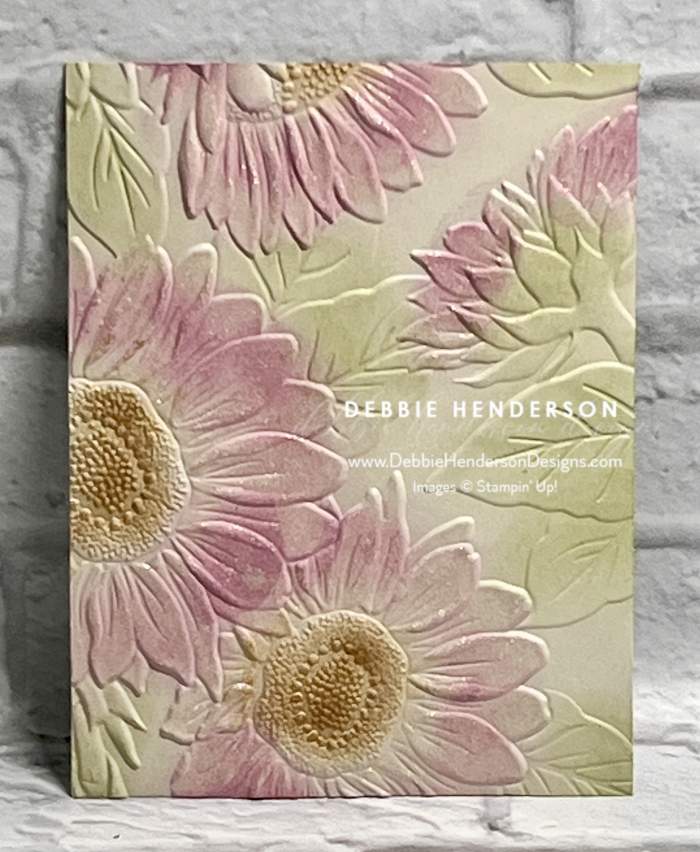
This is what I used:
- Sunflower 3D Embossing Folder
- Inks
- Mini Blending Brushes,
- Basic Beige Cardstock
- Wink Of Stella Clear Glitter Brush
Emboss with the embossing folder first. Add color by softly using the blending brushes. Finish off with Wink Of Stella Clear Glitter Brush on the flower.
Black Embossing on Metallic Foil Sheets:
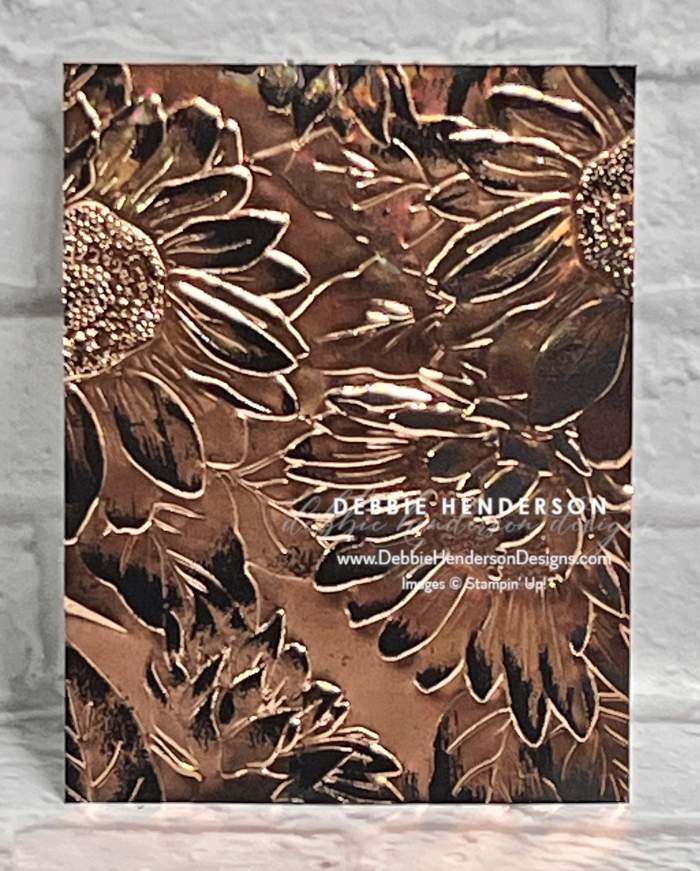
This is what I used:
- Sunflower 3D Embossing Folder
- Textured Metallic Sheets
- VersaMark Ink
- Black Embossing Powder
- Heat Tool
Emboss the cardstock first with the embossing folder. Swipe the ink pad upside-down over the embossing bumps lightly. Sprinkle gold embossing powder and melt with the heat tool.
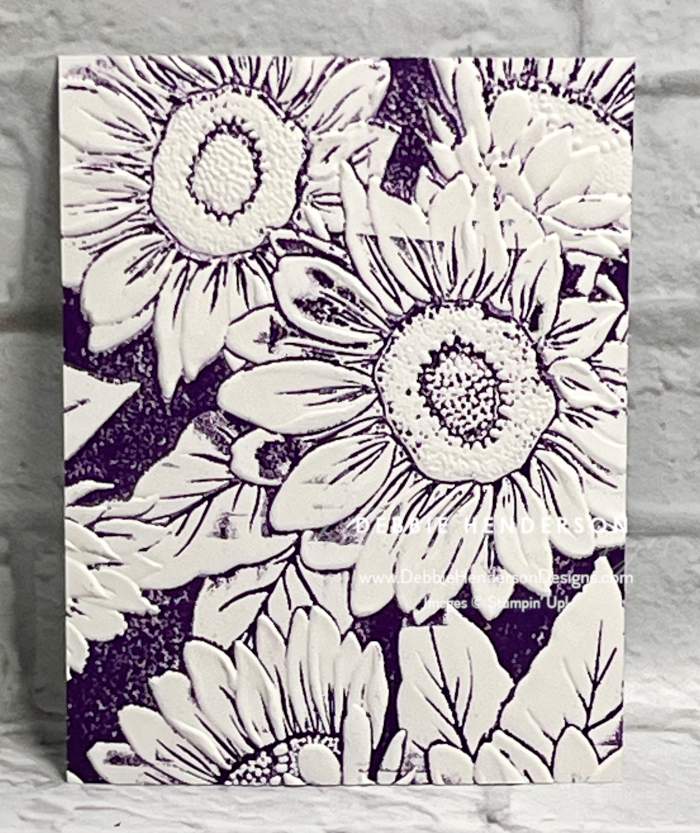
Inked Embossing Folder
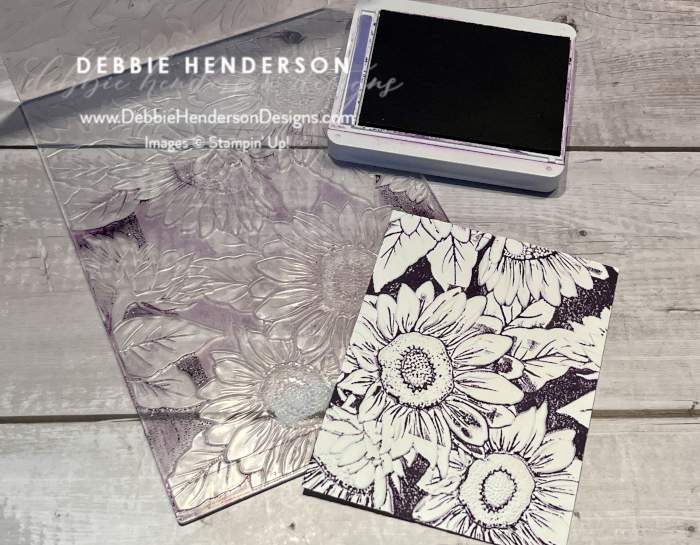
This is what I used:
- Sunflower 3D Embossing Folder
- Ink
- Basic White Cardstock
Emboss the cardstock first with the embossing folder. Swipe the ink pad upside-down over the bumps inside the embossing folder. Carefully place the white cardstock inside. Run through the machine. You can remove the ink from the embossing folder by running water from the faucet over the ink. TIP: Don’t use any black ink as your folder may get stained.
I hope you enjoyed these four techniques. I will finish up my cards using these layers and post again later. Have a great day!


Leave a Reply