Sketch Challenge Week With Festive Friends!

It’s Thursday Challenge time at Create With Stamping Friends . Our team used all three of these colors (plus neutrals) for our projects this week:

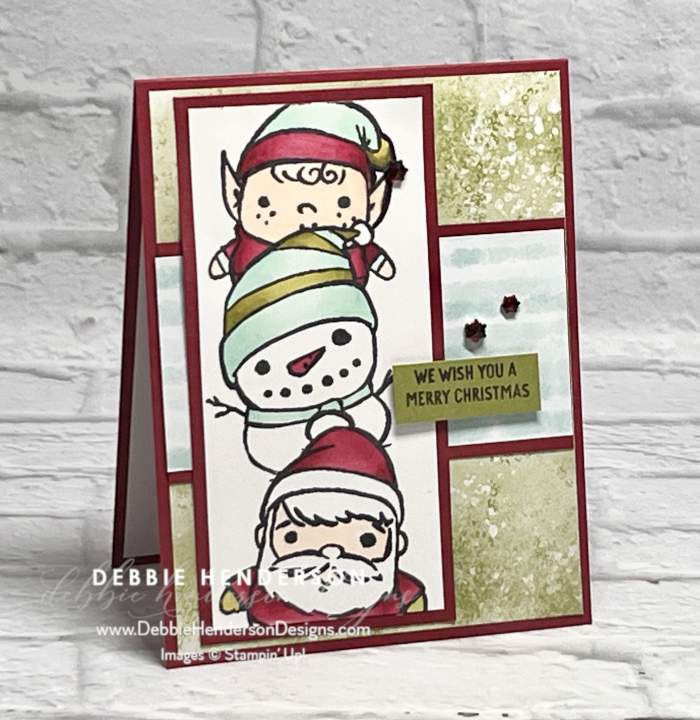
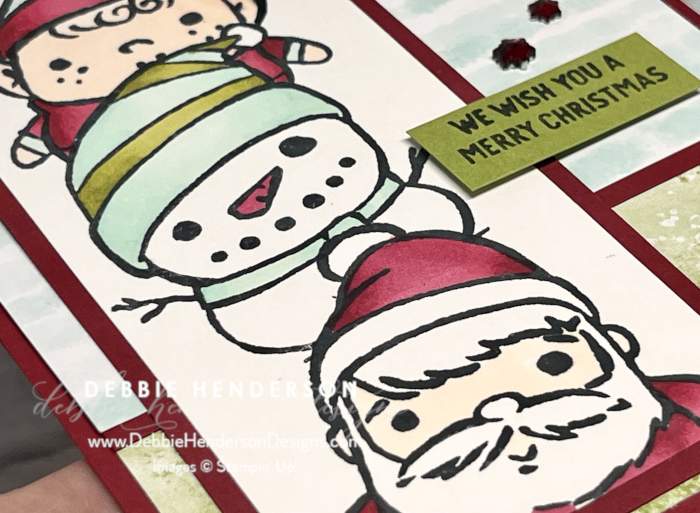
I think my Festive Friends Bundle has seen a lot of action these past few weeks. I am just so in love with the three images and I used all 3 of them this week along with the masking technique:
What is the masking technique? It’s when you use a mask so that you can stamp on top of another image without the lines showing on the other image. If you are new to stamping, I’ll show you how!
Stampin’ Up! Products Used:
- Stamps: Festive Friends
- Cardstock: Cherry Cobbler, Old Olive, Basic White
- Designer Paper: Regals, Subtles
- Inks: Memento Black
- Stampin’ Blends: Cherry Cobbler, Pool Party, Old Olive
- Tools & Accessories: Faceted Snowflakes, Stampin’ Dimensionals, Paper Snips
- Misc: Post-It Notes
Card Recipe:
- Card Base: Cherry Cobbler Cardstock 11 x 4-1/4. Score and fold at 5-1/2.
- Layer 2: Regals Designer Paper 5-1/4 x 4. Glue to card base.
- Layer 3: Cherry Cobbler Cardstock 4 x 2-1/4. Glue to card front centered.
- Layer 4: Subtles Designer Paper 4 x 2. Glue to cherry layer.
- Layer 5: Cherry Cobbler Cardstock 5-1/8 x 2-1/2. Glue vertically about 1/2″ from the left side.
- Layer 6: Basic White Cardstock 4-7/8 x 2-1/4. Follow the steps below for the stamping & masking (I cut my white layer to the correct size after I completed the stamping):
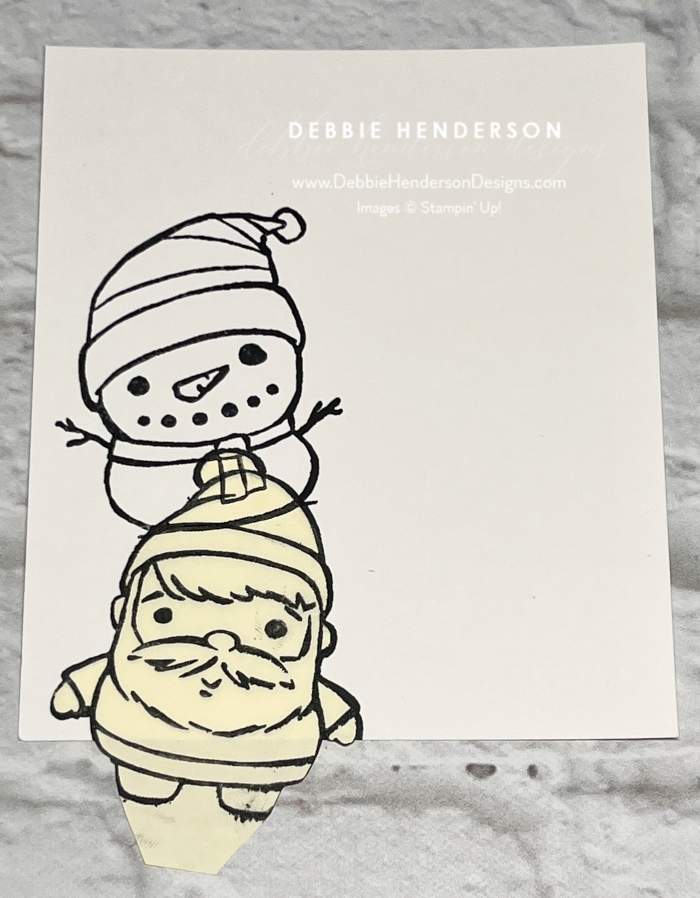

- Stamp the Santa image at the bottom with Memento Black Ink (photo not shown).
- Stamp the Santa image on a Post It Note making sure to include the adhesive section in the back. Cut out the Santa with Paper Snips.
- Place the Post It Santa over the stamped Santa on the white layer to cover him.
- Stamp the snowman image overlapping the Santa image on the Post It Note.
- Peel off the Post It Santa.
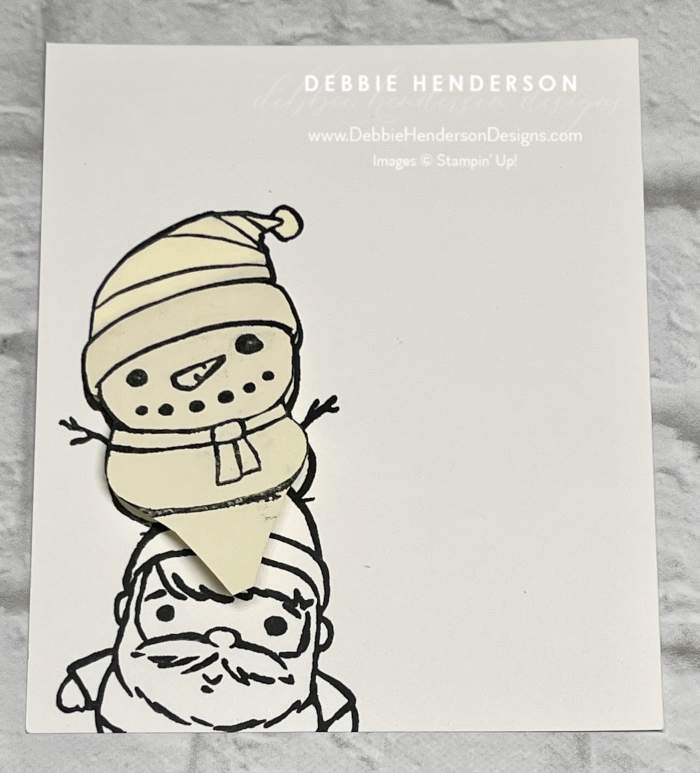
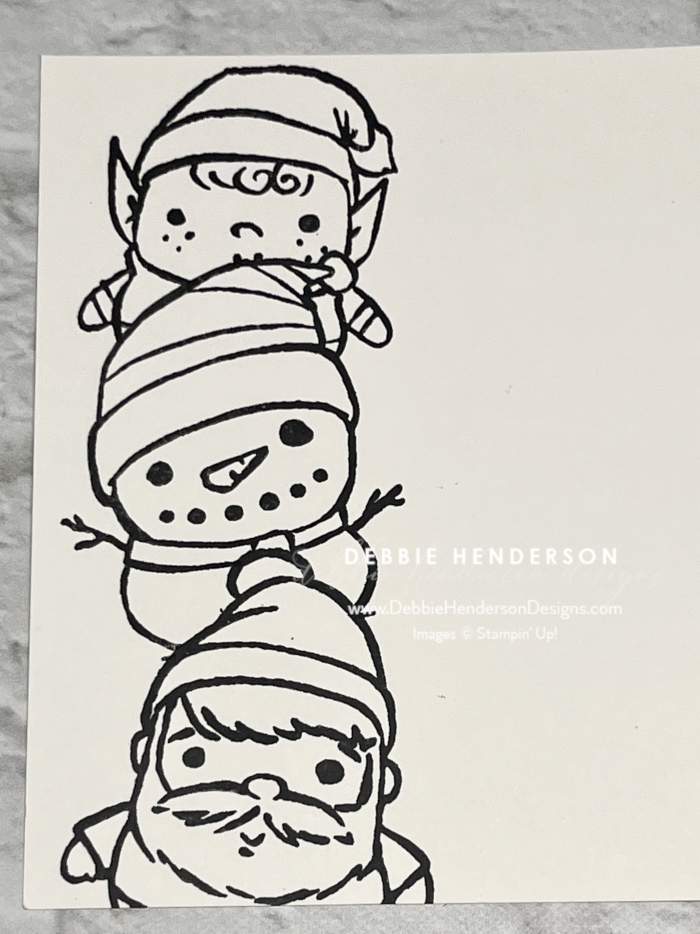
- Stamp the snowman image on a Post It Note, again include the sticky part on the back. Cut out with Paper Snips.
- Place Post It snowman over the stamped snowman on the white layer.
- Stamp the elf image above and on top of the snowman.
- Peel off the Post It Note and you should have all three images stamped to look like the last photo above.
Now let’s finish the card:
- Stamped Images: Color all 3 images with Stampin’ Blends and then glue the white layer to the cherry layer on the card front.
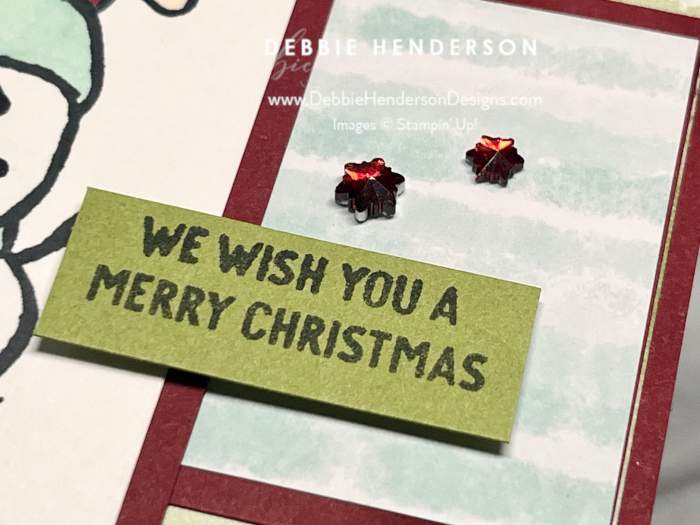
- Layer 7: Old Olive Cardstock 1-1/2 x 1/2. Stamp the sentiment with Memento Black Ink. Glue layered over the stamped layer and to the right on the designer paper with Stampin’ Dimensionals.
- Bling: Add Faceted Snowflakes to the elf hat and above the sentiment.
Check out what the rest of our team is up to this week by visiting Create With Stamping Friends and while visiting, check out our newest tutorial Collection:


TFS the card and also the texte of the Bible!