Sketch Challenge Week With Some Hot Foiling!
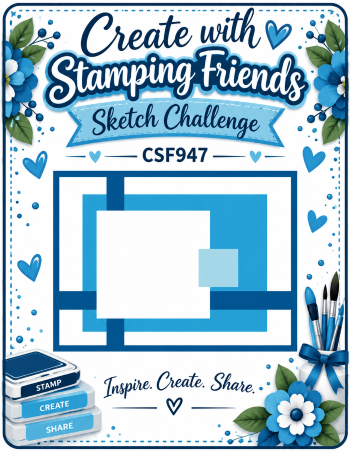
It’s Thursday Challenge time at Create With Stamping Friends and this week we used this sketch on our projects:
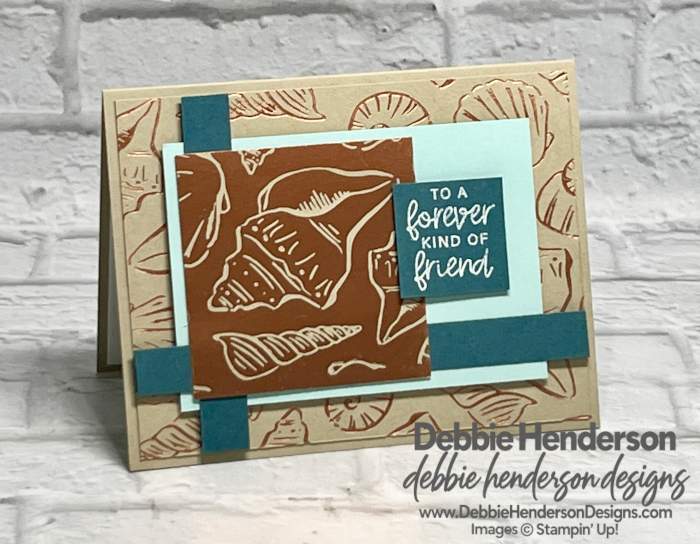
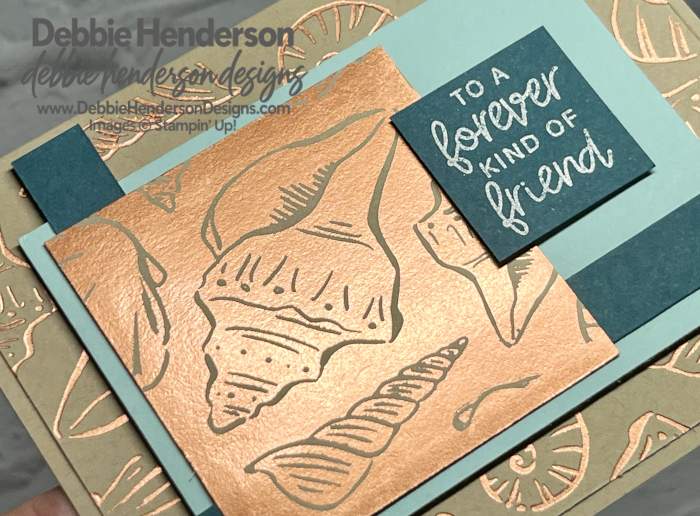
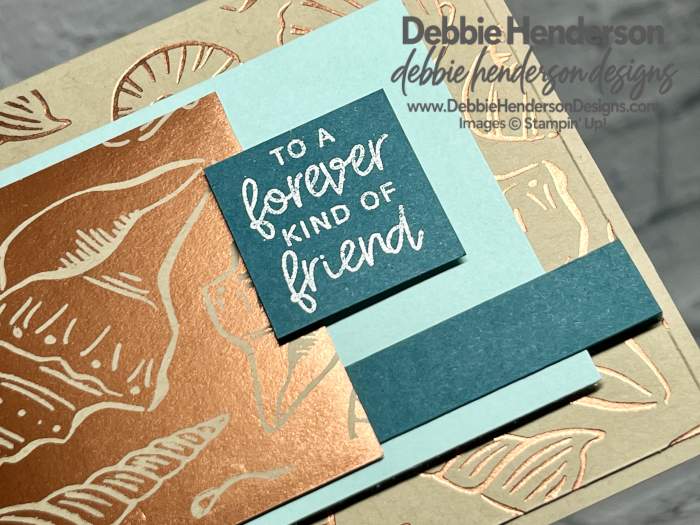
If you haven’t jumped in on our new Stampin’ Hot Foil System, you are going to fall in love with one of our newest hot foil dies. I used the Tide & Treasures Hot Foil Dies on my card on two layers. On one of the layers, I used the Reverse Hot Foil Die with the leftover foil sheet after I completed the first go-round. Look how pretty the copper is on both layers:
If you are not familiar with the Reverse Foil Die, it’s a large die that looks like a flat piece of metal that you add the used foil roll sheet on top to get two uses out of it. I’ll explain below in my instructions.
Stampin’ Up! Products Used:
- Stamps: Lily Of The Valley
- Cardstock: Crumb Cake, Pool Party, Pretty Peacock
- Inks: VersaMark
- Tools & Accessories: Tide & Treasures Hot Foil Dies, Reverse Hot Foil Die, Copper Stampin’ Hot Foil Rolls, Heat Tool, Basics Embossing Powders, Stampin’ Dimensionals
Card Recipe:
- Card Base: Crumb Cake Cardstock 8-1/2 x 5-1/2. Score and fold at 4-1/4.
- Layer 2: Crumb Cake Cardstock 5-1/4 x 4. Use the Stampin’ Hot Foil System with the Tide & Treasures Hot Foil Dies and the Copper Stampin’ Hot Foil Rolls. Pass through the system to foil and glue to card base flat. Save the used foil roll to use again later.
- Layer 3: Pool Party Cardstock 4-1/4 x 3. Glue to card front centered and with Stampin’ Dimensionals.
- Layer 4: Cut two strips of Pretty Peacock Cardstock measuring 4 x 1/2 and 5-1/4 x 1/2. Glue over the pool party layer 1″ from the left and 1″ from the bottom as shown. Add Stampin’ Dimensionals on the ends.
- Layer 5: Crumb Cake Cardstock 2-3/4 x 2-3/4. Use the Reverse Hot Foil Die and the used sheet of Copper foil with the Stampin’ Hot Foil System. Glue layer to pool party layer 1/8″ from the left and flat.
- Layer 6: Pretty Peacock Cardstock 1-1/4 x 1-1/4. Stamp the sentiment with VersaMark Ink. Sprinkle with white embossing powder. Melt the powder with the Heat Tool. Glue layered over the foil layer on the right with Stampin’ Dimensionals.
Check out what the rest of our team is up to this week by visiting Create With Stamping Friends and while visiting, check out our newest tutorial Collection:




Leave a Reply