Color Challenge Week With Frosted Pinecones!
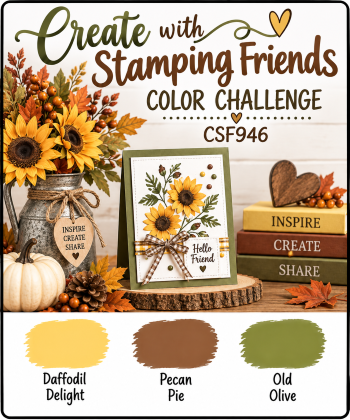
It’s Thursday Challenge time at Create With Stamping Friends and our team is using these three colors this week for our projects. I hope you’ll join in:
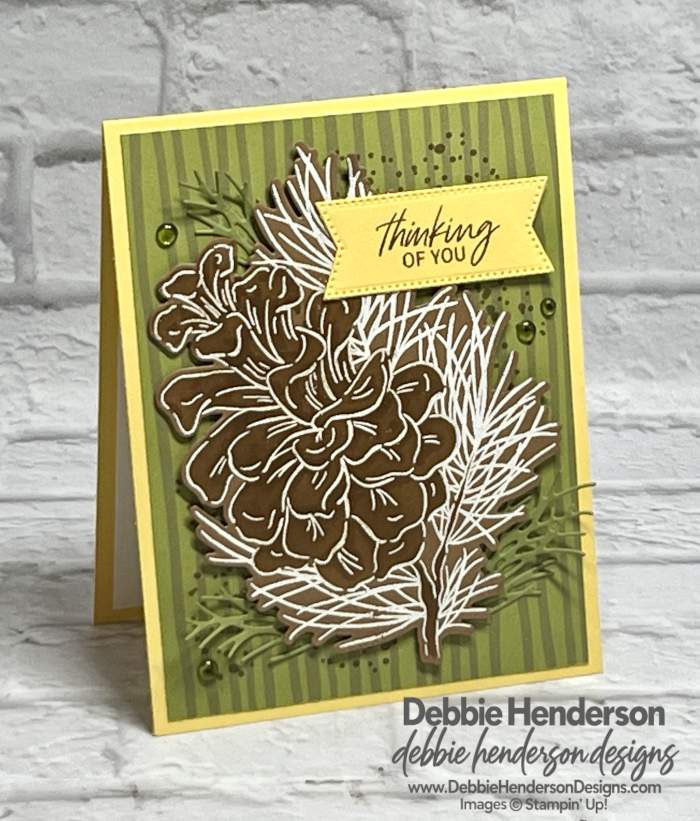
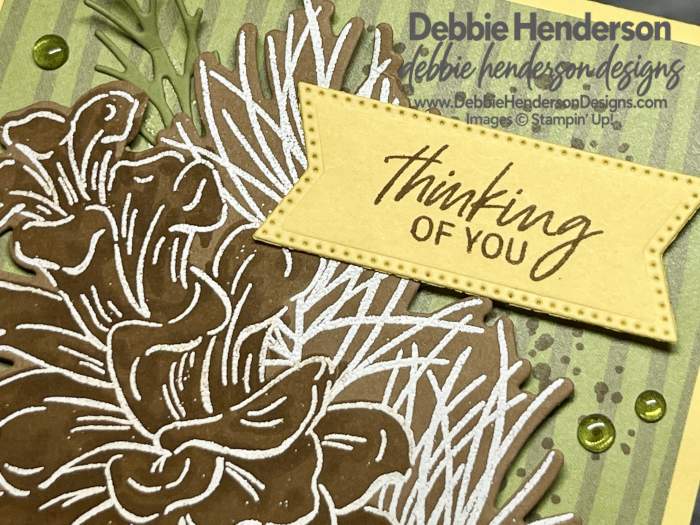
I kept my card Clean & Simple because that humungous pine cone is the main focus. I white-embossed it and added a tiny bit of color-on-color with our Decorative Masks:
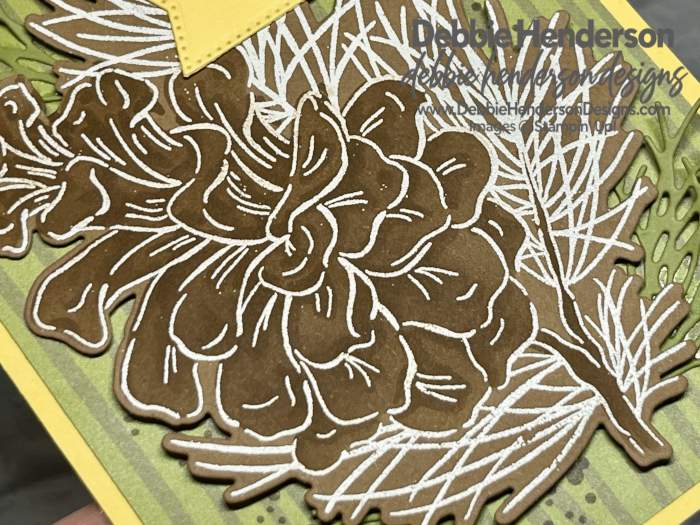
You can see how subtle the color is on these close-up images:
Stampin’ Up! Products Used:
- Stamps: Frosted Pinecones Bundle
- Cardstock: Daffodil Delight, Pecan Pie, Old Olive
- Designer Paper: Sunflower Fields
- Inks: VersaMark, Pecan Pie
- Tools & Accessories: Frosted Pinecones Dies, Frosted Pinecones Decorative Masks, Stylish Shapes Dies, Glossy Garden Dots, Stampin’ Dimensionals, Heat Tool, Basics Embossing Powder, Blending Brushes
Card Recipe:
- Card Base: Daffodil Delight Cardstock 11 x 4-1/4. Score and fold at 5-1/2.
- Layer 2: Sunflower Fields Designer Paper 5-1/4 x 4. Stamp the dotted image with Pecan Pie Ink around the edges. Glue to card base.
- Layer 3: Follow these steps:
- Stamp the large pinecone image to Pecan Pie Cardstock with VersaMark Ink.
- Sprinkle white embossing powder.
- Melt with the Heat Tool.
- Cut out with the die.
- Use a Blending Brush with Pecan Pie Ink and Decorative Mask #2 to add color to the pinecone.
- Glue to card front with Stampin’ Dimensionals.
- Sentiment: Stamp the sentiment on Daffodil Delight Cardstock with Pecan Pie Ink. Cut with the banner die from Stylish Shapes Dies. Glue to the top right with Stampin’ Dimensionals.
- Sprigs: Use the 2 sprig dies with Old Olive Cardstock to cut 3. Tuck and glue under the pinecone layer.
- Bling: Add Glossy Garden Dots to the designer paper background.
Check out what the rest of our team is up to this week by visiting Create With Stamping Friends and while visiting, check out our newest tutorial Collection:



Leave a Reply