Home For Christmas!
Welcome to our Create With Stamping Friends Inspiration Monday challenges. This week’s inspiration challenge is this photo:
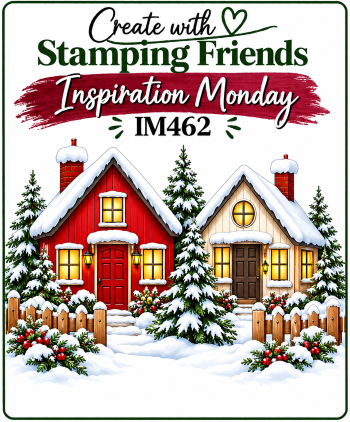
Seeing all of the homes in the inspiration photo brings back fond memories of packing the kids and going to Mom & Dad’s home for Christmas. There used to be about 40 of us that celebrated together each year. When my parents became older, they moved to a senior housing so our big holiday celebrations had to end. My Dad is no longer with us as well, so that also changed things. So many good memories though.
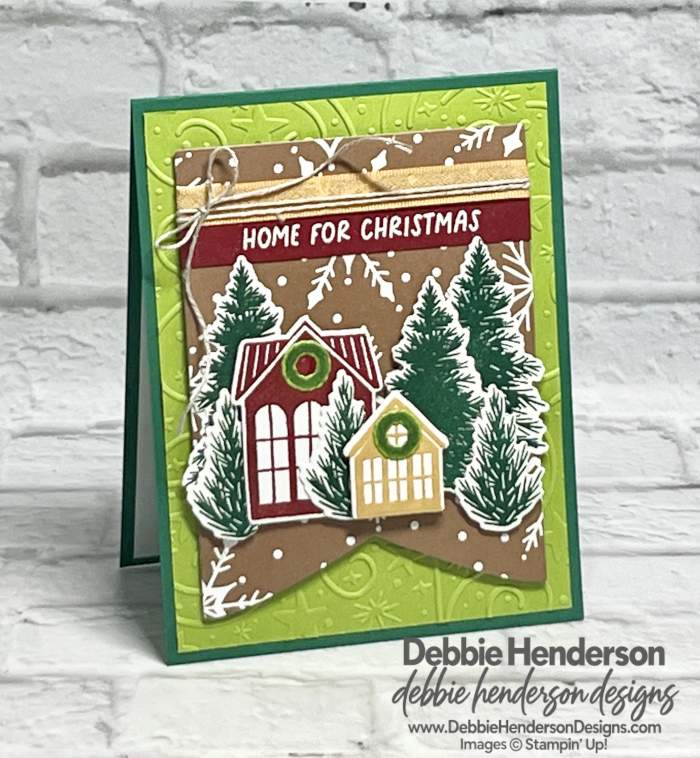
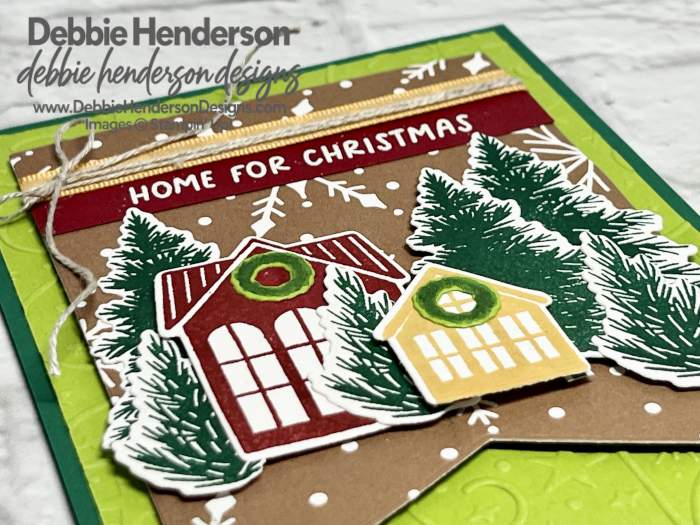
I used the Welcome Noel Bundle and added lots of layers on a banner from the Party Banners Dies:
Stampin’ Up! Products Used:
- Stamps: Welcome Noel
- Inks: VersaMark, Cherry Cobbler, Golden Glow, Shaded Spruce
- Cardstock: Shaded Spruce, Granny Apple Green, Cherry Cobbler, Basic White
- Designer Paper: Timeless Christmas
- Tools & Accessories: Welcome Noel Dies, Party Banners Dies, Swirls Of Magic Embossing Folder (now retired), Golden Glow Bordered Ribbon, Linen Thread, Stampin’ Dimensionals, Heat Tool, Basics Embossing Powders
Card Recipe:
- Card Base: Shaded Spruce Cardstock 11 x 4-1/4. Score and fold at 5-1/2.
- Layer 2: Granny Apple Green Cardstock 5-1/4 x 4. Emboss with the Swirls Of Magic Embossing Folder. Glue to card base.
- Layer 3: Timeless Christmas Designer Paper cut with the Party Banners Die 4-1/2 x 3-1/2. Set aside and follow these steps to add all of the layers:
- Cherry Cobbler Cardstock 3-1/2 x 1/2. Stamp the sentiment with VersaMark Ink and sprinkle with white embossing powder. Melt the powder with the Heat Tool. Glue to the banner 3/4″ from the top.
- Ribbon: Glue a strip of ribbon above the sentiment by gluing to the back of the banner.
- Linen Thread: Wrap the Linen Thread around the ribbon twice and tie into a bow.
- Trees: Stamp 3 trees on Basic White Cardstock with Shaded Spruce Ink. Cut with the die. Glue 2 flat on each side of the banner at the same height. Glue the 3rd overlapping the tree on the right side and a little lower with Stampin’ Dimensionals.
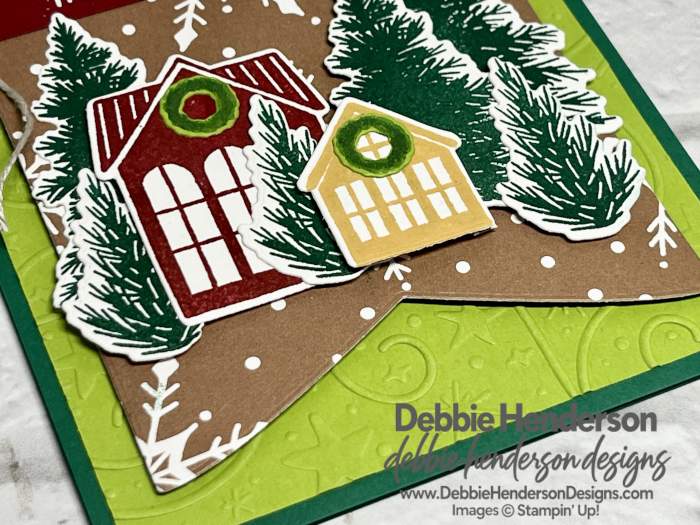
- Larger House: Stamp with Cherry Cobbler Ink on Basic White Cardstock. Cut with the die. Glue to the left over the tree with Stampin’ Dimensionals.
- Bushes: Stamp 3 bushes on Basic White Cardstock with Shaded Spruce Ink. Cut with the die. Glue one overlapping the cobbler house flat. Tuck and glue the 2nd truck on the left tucked under the house flat and the 3rd tree to the right with Stampin’ Dimensionals.
- Small House: Stamp with Golden Glow Ink on Basic White Cardstock. Cut with the die. Glue to the right of the larger house with Stampin’ Dimensionals.
- Wreath: Stamp 2 wreaths on Granny Apple Green Cardstock with Shaded Spruce Ink. Cut with the die. Glue to each hosue flat.
- Glue banner to card front with Stampin’ Dimensionals.
Make sure you visit Create With Stamping Friends to see what Connie created for our team this week and see our newest tutorial Collection too:




Leave a Reply