Color Challenge Week With Frosted Pinecones
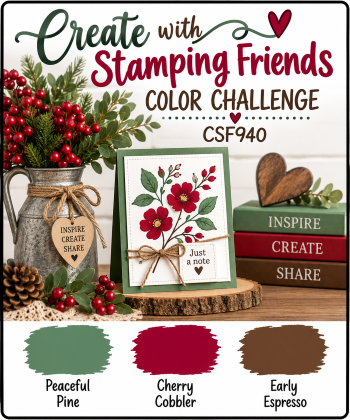
It’s Thursday Challenge time at Create With Stamping Friends and this week we have a color challenge. What would you create with these 3 colors? Oh and we can add any neutrals too!
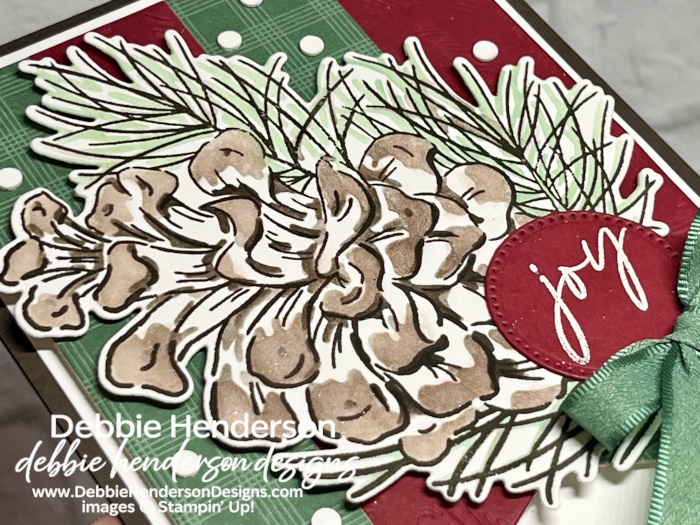
The pinecone image from the Frosted Pinecones Bundle is huge! So huge and so easy to color with coordinating masks that you can use with Sponge Daubers or Blending Brushes.
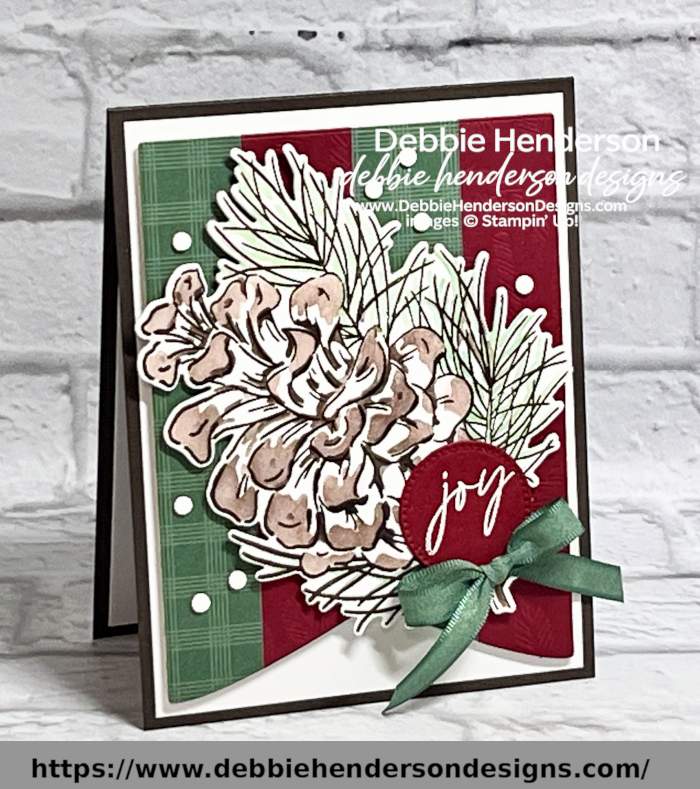
There are 5 masks total and I wanted to leave a lot of white space on my pinecones so I opted to use only 3 of the masks. Why? Because I can do that!
Stampin’ Up! Products Used:
- Stamps: Frosted Pinecones
- Cardstock: Early Espresso, Cherry Cobbler, Basic White
- Designer Paper: A Stitched Season
- Inks: Early Espresso, Peaceful Pine, VersaMark
- Tools & Accessories: Party Banners Dies, Stylish Shapes Dies, Adhesive Backed Bats Ghosts & Dots, Peaceful Pine Bordered Ribbon, Heat Tool, Basics Embossing Powders, Stampin’ Dimensionals
Card Recipe:
- Card Base: Early Espresso Cardstock 11 x 4-1/4. Score and fold at 5-1/2.
- Layer 2: Basic White Cardstock 5-1/4 x 4. Glue to card base
- Layer 3: Basic White Cardstock 5-1/4 x 4. Set aside.
- Layer 4: Cut 2 strips of A Stiched Season Designer Paper and 2 strips of Cherry Cobbler Cardstock, all measuring 5 x 1. Glue to 2nd layer of white. Cut with the Party Banners Dies5 x 3-3/4. Glue to card front with Stampin’ Dimensionals.
- Pinecone: Follow these steps:
- Stamp the large pinecone image on Basic White Cardstock with Early Espresso Ink.
- Use the mask to add the first detail to the pinecone with Early Espresso Ink. Blend very lightly so it looks like light early espresso.
- Use the 2nd mask over the pinecone to add the small details with Early Espresso Ink. Blend it darker.
- Use the 3rd mask of the pine needles with Peaceful Pine Ink. Blend very lightly so it looks like light peaceful pine.
- Glue pinecone to card front with Stampin’ Dimensionals.
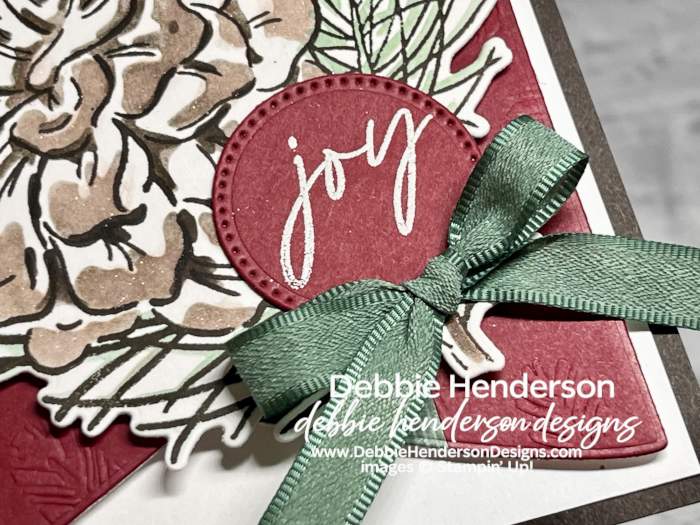
- Sentiment: Stamp the sentiment on Cherry Cobbler Cardstock with VersaMark Ink. Sprinkle with white embossing powder and melt the powder with the Heat Tool. Cut with the 1-1/4″ circle from Stylish Shapes Dies. Glue over the pinecone flat at the bottom right.
- Bow: Create a bow with the ribbon and glue to the bottom of the circle.
- Bling: Add Adhesive Backed Bats Ghosts & Dots around the pinecone.
Check out what the rest of our team is up to this week by visiting Create With Stamping Friends and while visiting, check out our newest tutorial Collection:




Leave a Reply