Lily Of The Valley Bundle & Valley In Bloom DSP!
Welcome to our Create With Stamping Friends Inspiration Monday challenges. This week’s inspiration challenge is this photo and that we are using to inspire us:

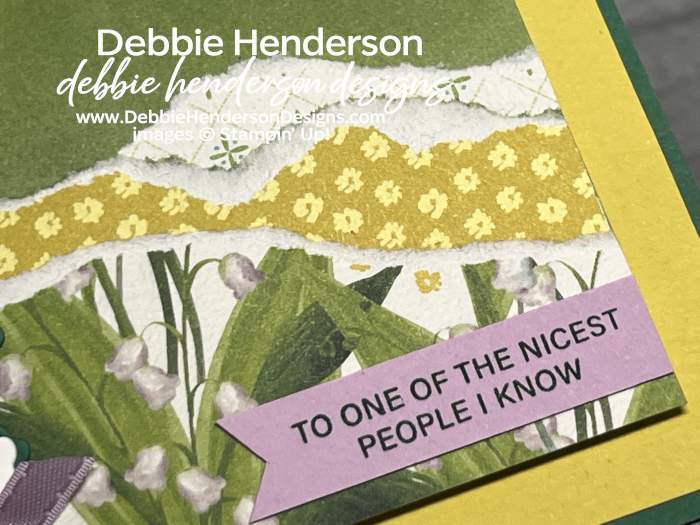
I decided to use the Valley In Bloom Designer Paper with 3 different patterns and I tore the tops of each one to give it a field & hill look once layered and glued:
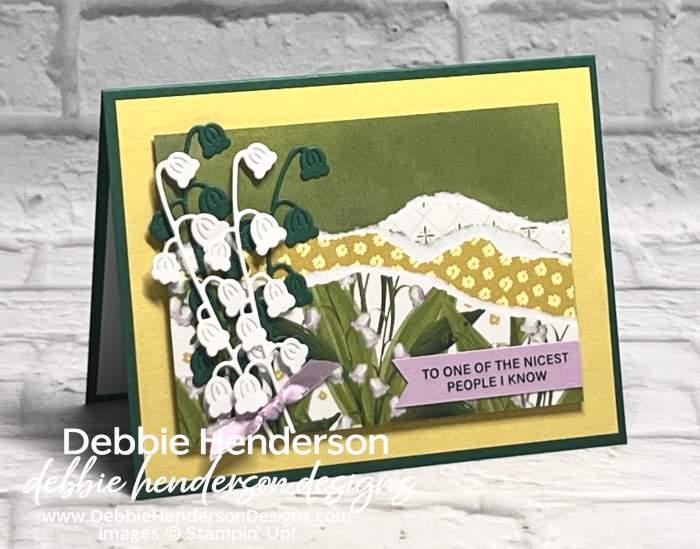
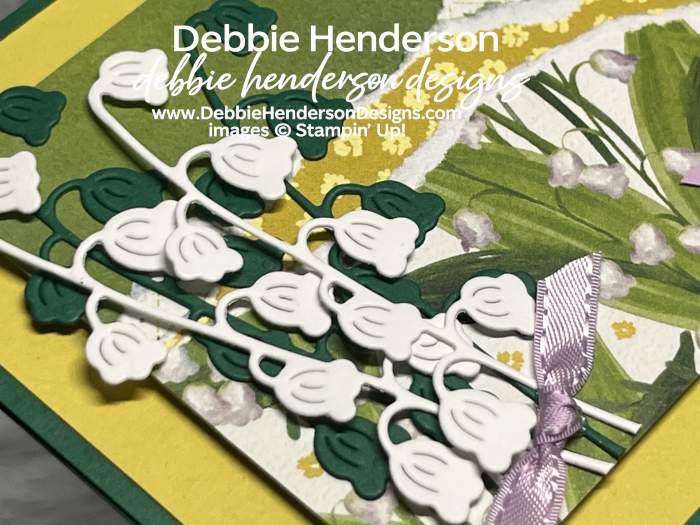
The beautiful flower diecuts are from the Lily Of The Valley Bundle. I think this bundle has been one of our most popular from our current products. Did you know we have a new Mini Catalog starting tomorrow? More new products yay!
Stampin’ Up! Products Used:
- Stamps: Lily Of The Valley
- Inks: Shaded Spruce
- Cardstock: Shaded Spruce, Crushed Curry, Basic White, Fresh Freesia
- Designer Paper: Valley In Blom
- Tools & Accessories: Lily Of The Valley Dies, Fresh Freesia Satin Ribbon, Mini Stampin’ Dimenisonals, Stampin’ Dimensionals, Paper Snips
Card Recipe:
- Card Base: Shaded Spruce Cardstock 8-1/2 x 5-1/2. Score and fold at 4-1/4.
- Layer 2: Crushed Curry Cardstock 5-1/4 x 4. Glue to card base.
- Layer 3: Peaceful Pine Cardstock 4-1/2 x 3-1/4. Set aside.
- Layer 4: Use 3 different patterns from the Valley In Bloom Designer Paper and cut the strips 4-1/2″ long. Make the front strip about 2″ tall and tear across the top. The other 2 strips are about 1″ tall and tear across the top as well. Glue all 3 strips stacked together to resemble a hill. Glue to peaceful pine layer even at the bottom and sides. Glue completed layer to card front with Stampin’ Dimensionals.
- Flowers: Use the lily die to cut 2 Basic White Cardstock flowers and 2 Shaded Spruce Cardstock flowers. Glue to the left over the designer paper with Mini Stampin’ Dimensionals and trim the bottoms to fit.
- Sentiment: Fresh Freesia Cardstock 2-1/4 x 1/2. Trim the left end into a banner shape. Stamp the sentiment with Shaded Spruce Ink. Glue to designer paper 1/8″ from the bottom and flat.
Make sure you visit Create With Stamping Friends to see what Connie created for our team this week and see our newest tutorial Collection too:




Leave a Reply