Splash & Relax Summer Scene!
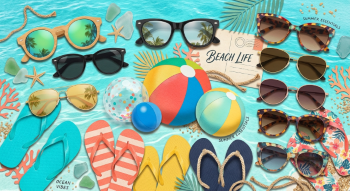
Welcome to our Create With Stamping Friends Inspiration Monday challenges. If you’ve been to the beach lately, you know you’ll need a lot of the items on our inspiration photo this week. Doesn’t this photo make you want to go to the beach right now?
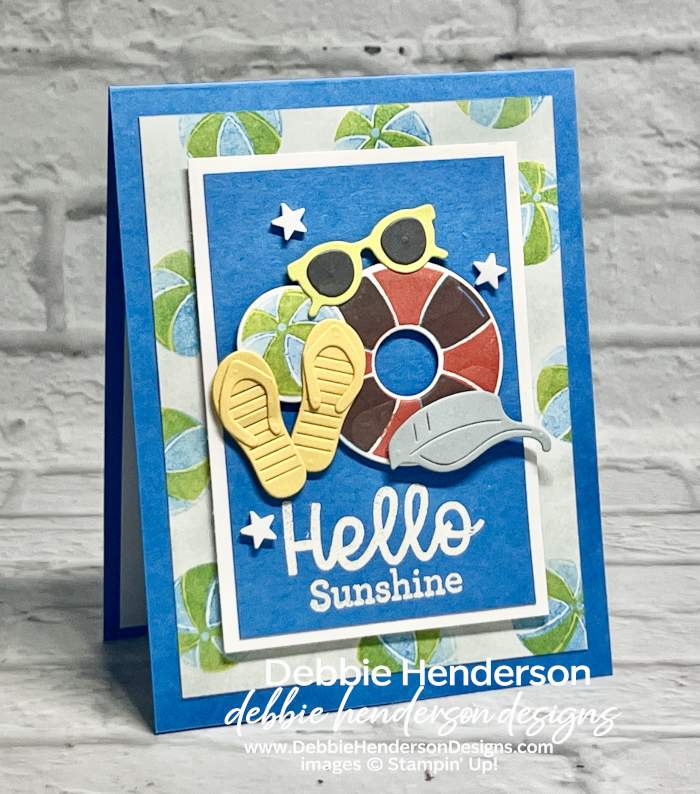
I added lots of diecut and stamped layers to my card this week:
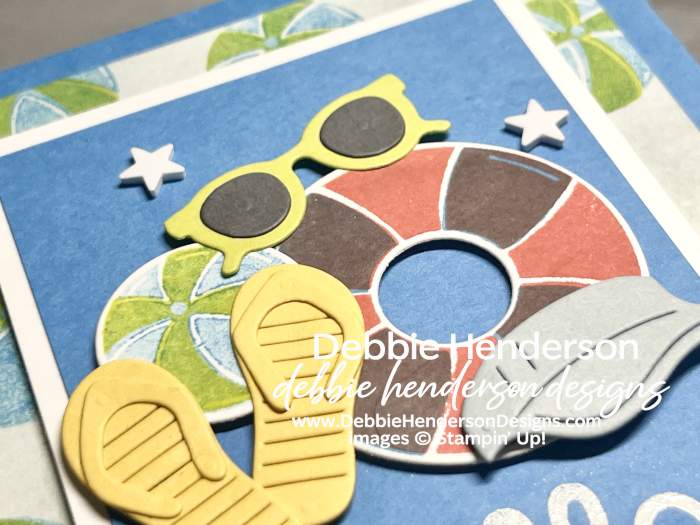
It was so much fun stamping, diecutting and layering:
Stampin’ Up! Products Used:
- Stamps: Splash & Relax
- Inks: VersaMark, Azure Afternoon, Lemon Lime Twist, Calypso Coral, Cloud Cover
- Cardstock: Azure Afternoon, Lemon Lime Twist, Basic Gray, Daffodil Delight, Cloud Cover, Basic White
- Tools & Accessories: Splash & Relax Dies, Heat Tool, Basics Embossing Powders, Wonderful Stars Puffy Stickers, Stampin’ Dimensionals, Mini Stampin’ Dimensionals, Blending Brush
Card Recipe:
- Card Base: Azure Afternoon Cardstock 11 x 4-1/4. Score and fold at 5-1/2.
- Layer 2: Basic White Cardstock 5 x 3-3/4. Follow these steps:
- Use a Blending Brush to add Cloud Cover Ink all over the layer.
- Stamp the first image of the beach ball using Azure Afternoon Ink on scrap paper first for a lighter color. Repeat around all 4 edges of the cardstock.
- Stamp the second image of the beach ball using Lemon Lime Twist Ink. Repeat over all beach balls.
- Glue layer to card base.
- Layer 3: Basic White Cardstock 4-1/4 x 3. Glue to card front with Stampin’ Dimensionals.
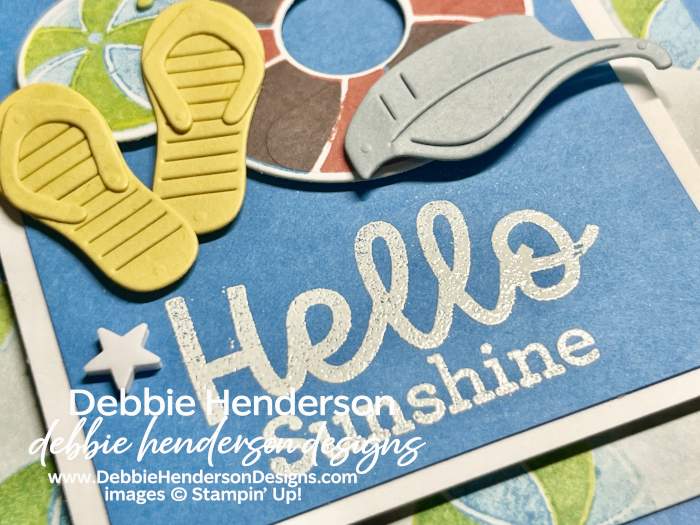
- Layer 4: Azure Afternoon Cardstock 4 x 2-3/4. Stamp the sentiment at the bottom with VersaMark Ink. Sprinkle with white embossing powder and melt with the Heat Tool. Glue to white layer.
- Diecuts: Add the following diecuts above the sentiment in this order:
- Stamp the round floatie on Basic White Cardstock with Calypso Coral Ink. Stamp the 2nd image over the 1st image with Azure Afternoon Ink. Cut with the die and glue to car front with Stampin’ Dimensionals.
- Stamp the beach ball following the same steps as layer 2. Cut the ball with the die and glue to the left of the floatie with Stampin’ Dimensionals.
- Use the die and Lemon Lime Twist Cardstock to cut the sunglasses. Use Basic Gray Cardstock to cut the lens. Glue the lens to the sunglasses. Glue glasses above the floatie with Mini Stampin’ Dimensionals.
- Use the sandals dies with Daffodil Delight Carstock. Glue the straps to the sandals. Glue to sandals over the beach ball with Mini Stampin’ Dimensionals.
- Cut the visor with the die and Cloud Cover Cardstock. Glue over the floatie with Stampin’ Dimensionals.
- Bling: Add Wonderful Stars Puffy Stickers around the diecuts.
Make sure you visit Create With Stamping Friends to see what Connie created for our team this week and see our newest tutorial Collection too:




Leave a Reply