Color Challenge Week With Lovely Arrangements!
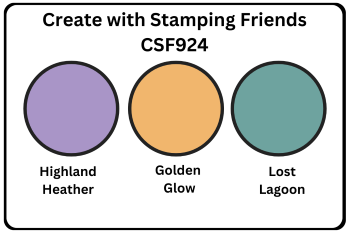
It’s Thursday Challenge time at Create With Stamping Friends and this week, our challenge team used these three colors on our projects:
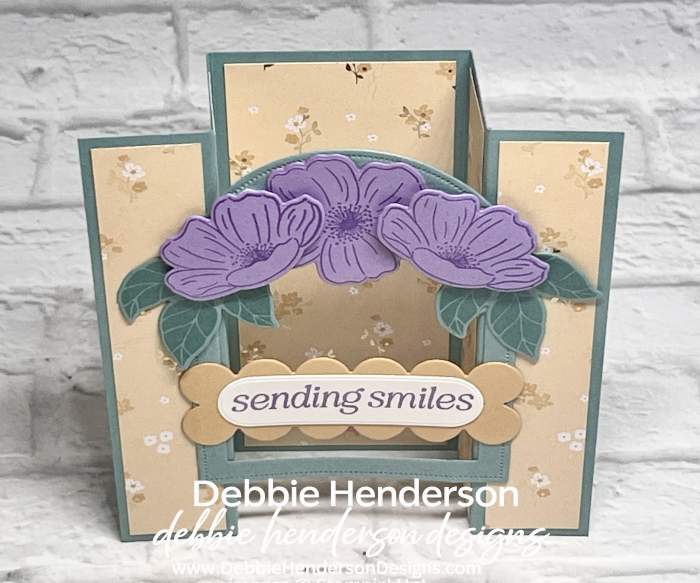
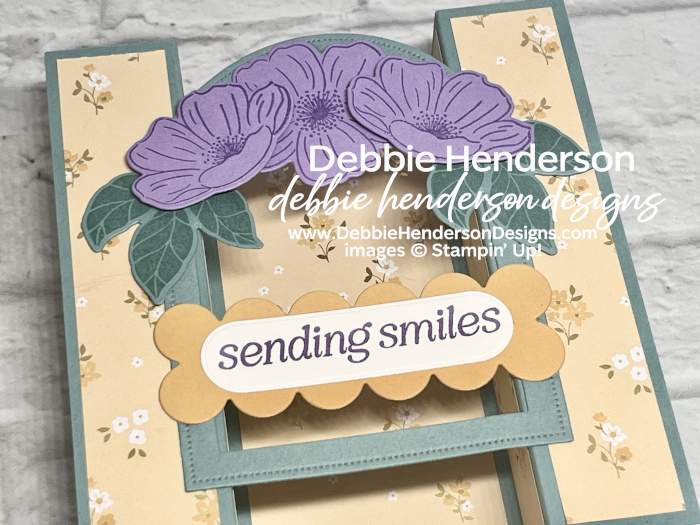
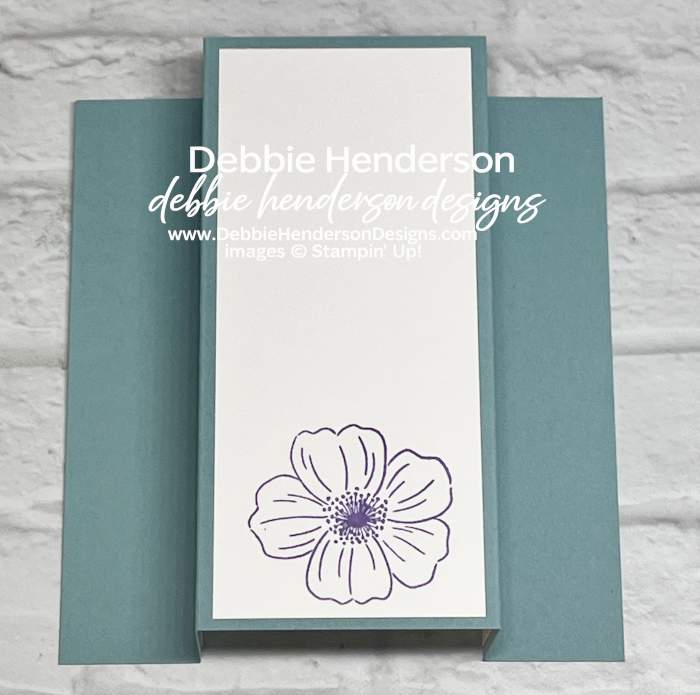
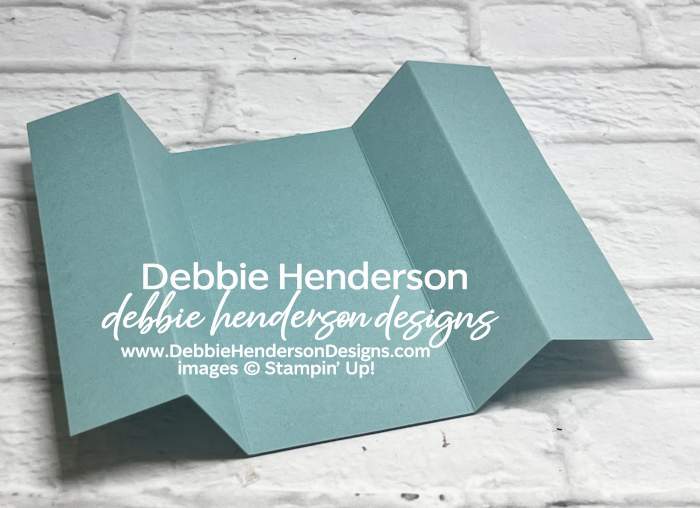
I created a 5-Panel Card and then added an arch to the front adorned with flowers and leaves. In order for me to add the beautiful designer paper on all 5 panels, I added a Basic White Cardstock layer on the back for writing and/or sentiments:
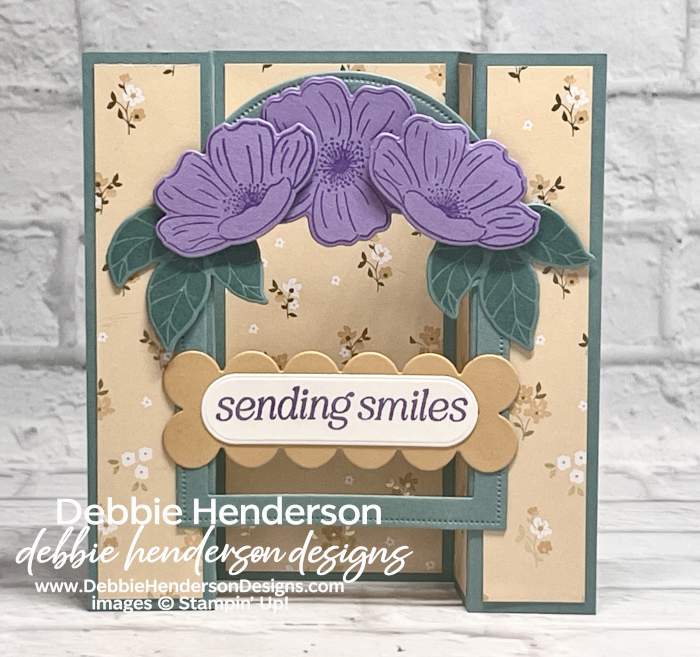
You can see the view from the top, a close-up of my flowers & sentiment and the white layer on the back here:
Stampin’ Up! Products Used:
- Stamps: Lovely Arrangements
- Cardstock: Highland Heather, Golden Glow, Lost Lagoon, Basic White
- Designer Paper: Bloom Boutique
- Inks: Highland Heather, Lost Lagoon
- Tools & Accessories: Lovely Arrangements Dies, Everyday Arches Dies, Stampin’ Dimensionals
Card Recipe:
- Card Base: Lost Lagoon Cardstock 7-1/2 x 5-1/2. Score at 1-1/4 & 2-1/2 on both ends.
- Arches: Prepare the arches layer by using two dies inside each other to cut Lost Lagoon Cardstock. The dies measure 4-1/2 x 3-1/4 and 3-7/8 x 2-1/2. Set aside (you won’t be using the middle section, save for another project)

- Designer Paper Layers: Cut the following with the Bloom Boutique Designer Paper:
- 4 pieces 5-1/4 x 1
- 1 piece 5-1/4 x 2-1/4
- Glue all 5 pieces to each panel
- Glue the diecut arch to card front about 3/4″ from the bottom by laying the card flat.
- Flowers: Stamp 1 large flower and 2 smaller flowers on Highland Heather Cardstock with Highland Heather Ink. Cut with the dies. Glue the large flower flat to the arch on the top center and add the smaller flowers on each side with Stampin’ Dimensionals.
- Leaves: Stamp 2 leaf branches on Lost Lagoon Cardstock with Lost Lagoon Ink. Cut with the die. Tuck and glue under the flowers flat on each side of the arch.
- Border: Use the multi-circle die to cut two rows of the circles with Golden Glow Cardstock. Glue to arch 1/2″ from the bottom and flat.
- Sentiment: Stamp the sentiment on Basic White Cardstock with Highland Heather Ink. Cut with the label die. Glue over the circles flat.
Note: You will need a 6 x 5-1/2 envelope to fit the card inside.
Check out what the rest of our team is up to this week by visiting Create With Stamping Friends and while visiting, check out our newest tutorial Collection:


Leave a Reply