Sweet Jar Bundle & County Woods Designer Paper!

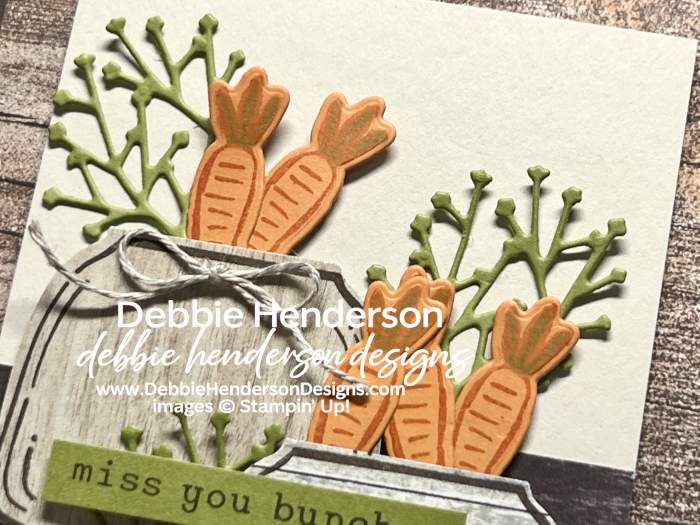
I felt the need to use the neat carrot image from the Easter Basket Bundle and filled my jars full of them. It was fun to play around with all of these products:
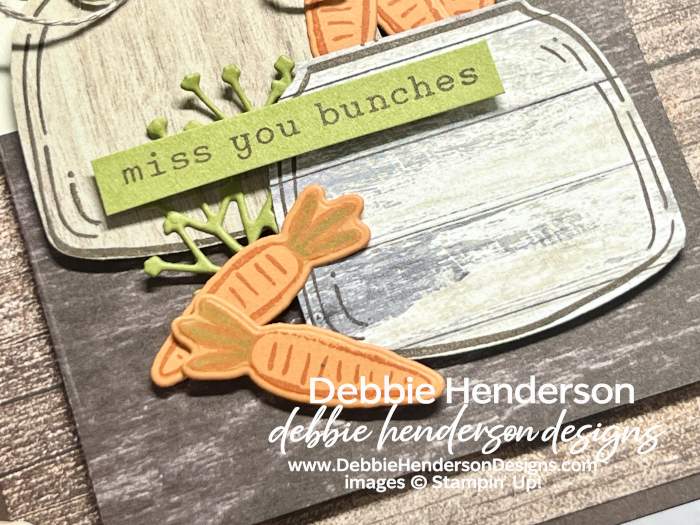
The cute jars are from the Sweet Jar stamp set that just sold out. I also used the Sweet Jar Builder Punch to cut them out. If you were lucky enough to purchase these products, show me what you would fill your jars with. Here are my supplies & layers:
Supplies:
- Stamps: Easter Basket, Sweet Jar
- Inks: Early Espresso, Pumpkin Pie
- Cardstock: Early Espresso, Pumpkin Pie, Old Olive
- Designer Paper: Country Woods
- Tools & Accessories: Easter Basket Dies, Beautifully Celebrated Dies, Sweet Jar Builder Punch, Linen Thread
- Card Base: Early Espresso Cardstock 11 x 4-1/4. Score and fold at 5-1/2.
- Layer 2: Country Woods Designer Paper 5-1/4 x 4. Glue to card base.
- Layer 3: Basic White Cardstock 4-1/2 x 3-1/4. Use as a base for these two layers:
- Basic Beige Cardstock 3-1/4 x 2-1/4. Glue to the top of the white layer.
- Country Woods Designer Paper 3-1/4 x 2-1/4. Glue to the bottom of the white layer.
- Glue layer to card front with Stampin’ Dimensionals.
- Jars: Stamp 2 jars with Early Espresso Cardstock on two patterns of the Country Woods Designer Paper. Cut with the punch and glue to card front with Stampin’ Dimensionals.
- Twigs: Cut 2 twigs with the die and Old Olive Cardstock. Tuck and glue at the top of the jars.
- Carrots: Stamp 7 carrots on Pumpkin Pie Cardstock with Pumpkin Pie Ink. Cut with the die. Color the tops with Old Olive Light Stampin’ Blends. Tuck and glue 5 carrots inside the 2 jars with Mini Stampin’ Dimensionals. Glue 2 carrots to the left of the bottom jar with Mini Stampin’ Dimensionals.
- Sentiment: Stamp the sentiment on Old Olive Cardstock with Early Espresso Ink. Cut close to the wording. Glue over both jars with Mini Stampin’ Dimensionals.
- Ribbon: Tie the Linen Thread into a bow and glue to the jar.


Leave a Reply