Tractor & Co Bundle and Christmas Tags & More!

Welcome to our Create With Stamping Friends Inspiration Monday challenges. This week’s inspiration challenge is right up my alley:
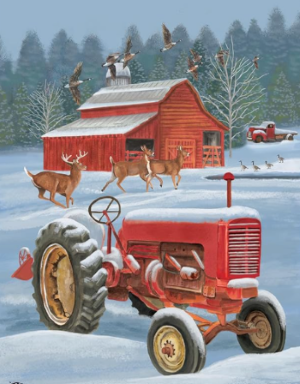
I am one of those girls that drives a tractor. I use my tractor a lot during the summer months because I have 2 acres of property to take care of, lots of flower beds and a veggie garden. During the winter months, my tractor is what I use to clear a very long driveway of snow with an attached snowblower and a scraper blade on the back. You should see me go!
Although my tractor is an orange Kubota, today’s card features a red tractor just like the inspiration photo:
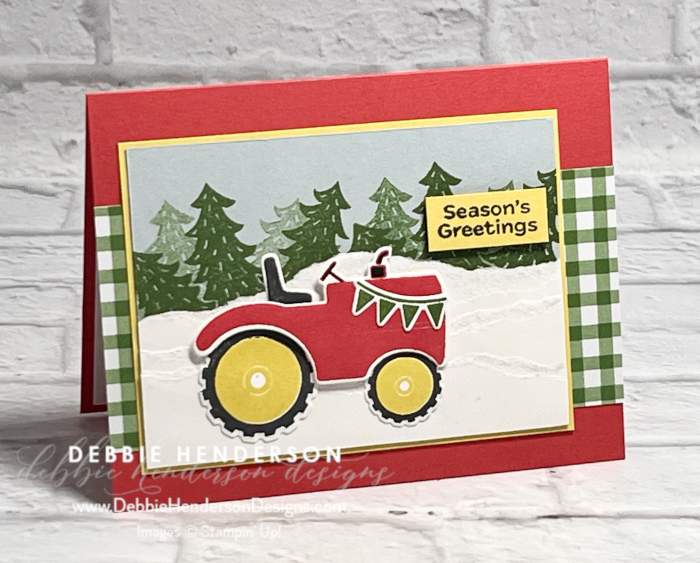
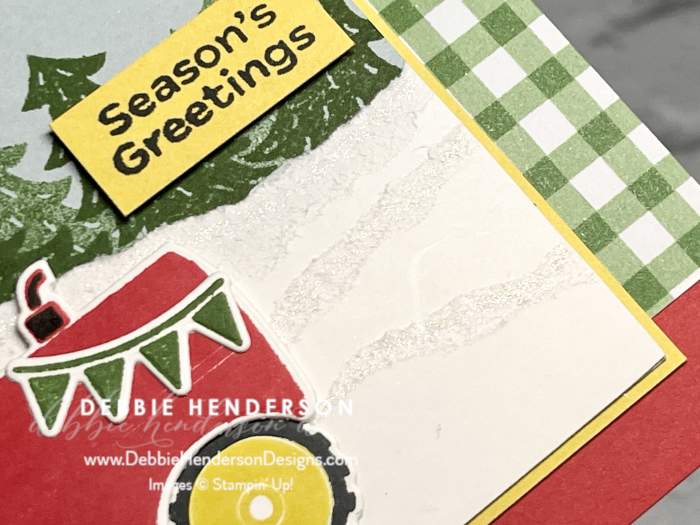
I even added three layers of torn cardstock snow layers and on the torn edges, I colored in some Wink Of Stella Clear Glitter Brush. It sparkles in real life!
Stampin’ Up! Products Used:
- Stamps: Tractor & Co
- Inks: Poppy Parade, Garden Green, Darling Duckling, Memento Black, Basic Black Stampin’ Blends
- Cardstock: Poppy Parade, Darling Duckling, Cloud Cover, Basic White
- Designer Paper: Christmas Tags & More
- Tools & Accessories: Tractor & Co Dies, Wink Of Stella Clear Glitter Brush, Stampin’ Dimensionals, Paper Snips
Card Recipe:
- Card Base: Poppy Parade Cardstock 8-1/2 x 5-1/2. Score and fold at 4-1/4.
- Layer 2: Christmas Tags & More Designer Paper 5-1/2 x 2-1/2. Glue to card base 3/4″ from the bottom.
- Layer 3: Darling Duckling Cardstock 4-5/8 x 3-3/8. Glue to card front centered.
- Layer 4: Cloud Cover Cardstock 4-1/2 x 3-1/4 stamp the tree image across the top repeatedly with Garden Green Ink. Stamp twice without reinking for a lighter ink color. Set aside.
- Snow Layers: Follow these steps:
- Basic White Cardstock 5-1/2 x 4-1/4.
- Tear across the long side twice to end up with 3 pieces.
- Layer and glue on the Cloud Cover layer, with the first one overlapping the bottom of the trees. The strips will be too long on each side and the bottom one should go beyond the bottom edge.
- Trim all 3 sides even with the with a Paper Trimmer.
- Add Wink Of Stella to the 3 torn edges.
- Glue layer to card front.
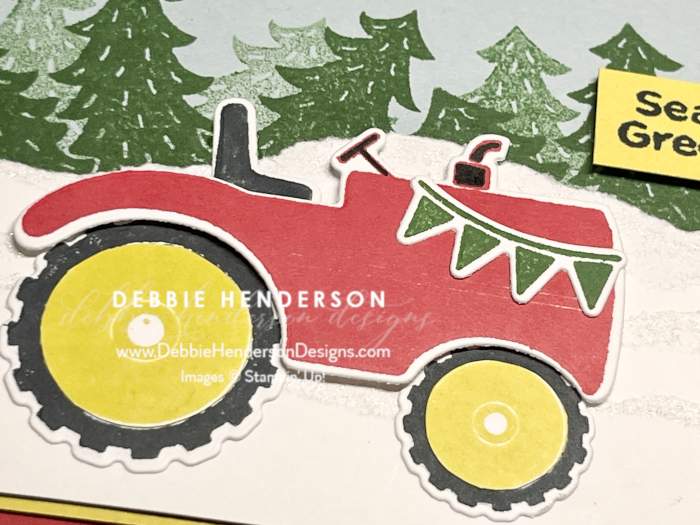
- Tractor: Stamp and diecut the following to assemble the tractor:
- Tractor Body: Poppy Parade Ink on Basic White Cardstock.
- Color the steering wheel and smoke stack with the black Stampin’ Blends over the poppy ink.
- Tires: Stamp two sets of tires on Basic White Cardstock. One with Memento Black and the other set with Darling Duckling. Use Paper Snips to cut around the round line on both tires. Glue to the black tires.
- Seat: Memento Ink on Basic White Cardstock.
- Banner: Garden Green Ink on Basic White Cardstock.
- Glue banner to tractor.
- Glue tractor body to card front with Stampin’ Dimensionals.
- Tuck and glue the seat and tires flat to the tractor.
- Sentiment: Stamp sentiment on Darling Duckling Cardstock 1-1/4 x 5/8 with Memento Ink. Glue to card front at the right with Stampin’ Dimensionals.
Make sure you visit Create With Stamping Friends to see what Connie created for our team this week and see our newest tutorial Collection too:


Leave a Reply