Delicate Pines Bundle & Dry Embossing!

Welcome to our Create With Stamping Friends Inspiration Monday challenges. This week’s inspiration challenge is a winter scene:

I chose to replicate the layout, colors and theme of our inspiration photo this week by using a few different Stampin’ Up! products:
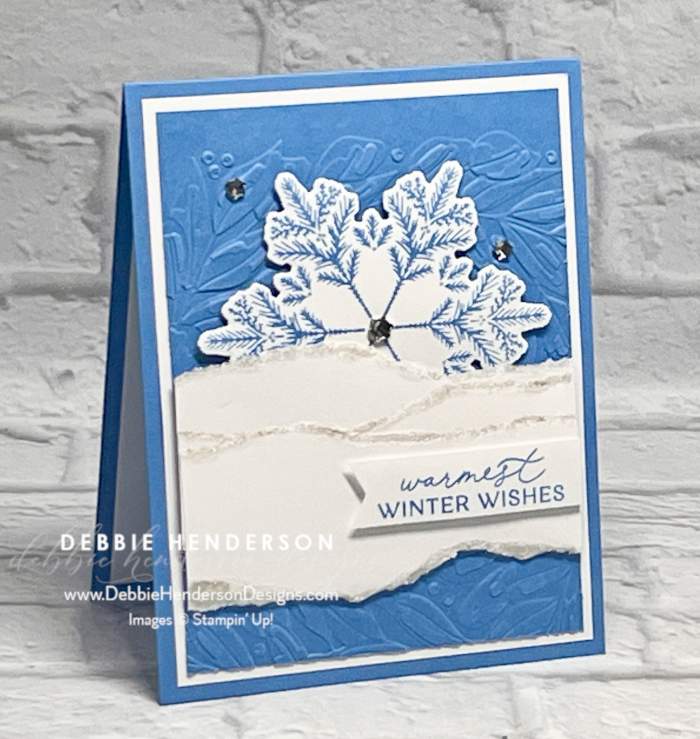
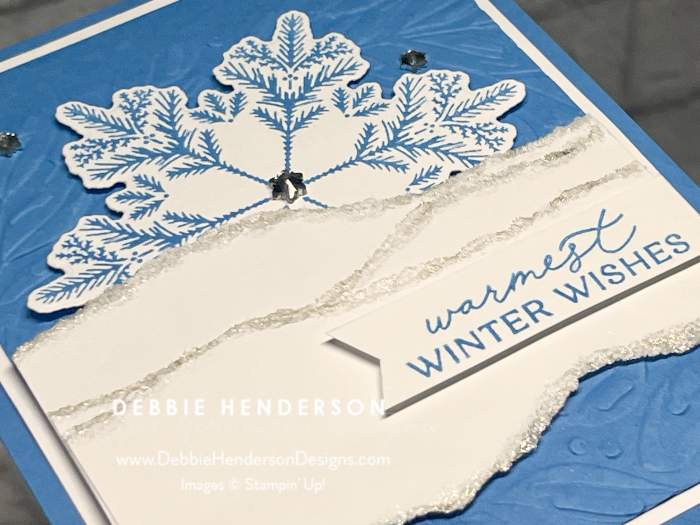
The edge of each torn white layer was colored with Wink Of Stella Clear Glitter Brush and sparkles so much in real life:

Stampin’ Up! Products Used:
- Stamps: Delicate Pines
- Inks: Azure Afternoon
- Cardstock: Azure Afternoon, Basic White
- Tools & Accessories: Delicate Pines Dies, Traditional Wreath 3D Embossing Folder, Faceted Snowflakes, Wink Of Stella Clear Glitter Brush, Stampin’ Dimensionals, Paper Snips
Card Recipe:
- Card Base: Azure Afternoon Cardstock 11 x 4-1/4. Score and fold at 5-1/2.
- Layer 2: Basic White Cardstock 5-1/4 x 4. Glue to card base.
- Layer 3: Azure Afternoon Cardstock 5 x 3-3/4. Emboss with the Traditional Wreath Embossing Folder. Glue to card front.
- Snowflake: Stamp the snowflake on Basic White Cardstock with Azure Afternoon Ink. Cut with the die. Glue to card front about 1″ from the top with Stampin’ Dimensionals.
- Snow: Tear 3 strips of Basic White Cardstock 3-3/4″ wide. Add Clear Wink Of Stella to the edges. Glue all 3 of the strips together so edges are showing. Glue over the snowflake with Stampin’ Dimensionals.
- Sentiment: Stamp the sentiment on Basic White Cardstock 2-1/4 x 5/8 with Azure Afternoon Ink. Use Paper Snips to cut the left end into a banner shape. Glue over the snow layers even on the right with Stampin’ Dimensionals.
- Bling: Add Faceted Snowflakes to the center of the snowflakes and 2 to the embossed background
Make sure you visit Create With Stamping Friends to see what Connie created for our team this week and see our newest tutorial Collection too:


Thank you for the wonderful snowflake you made!!! and also thank you for the Bibleverse! I’m happy when I read this!