Cheers & Sips Party Time Theme!
Welcome to Create With Stamping Friends Creatively Simple! July has been a Party Time theme and I used the Celebratory Sips Designer Paper and Cheers & Sips Bundle for this week’s card!

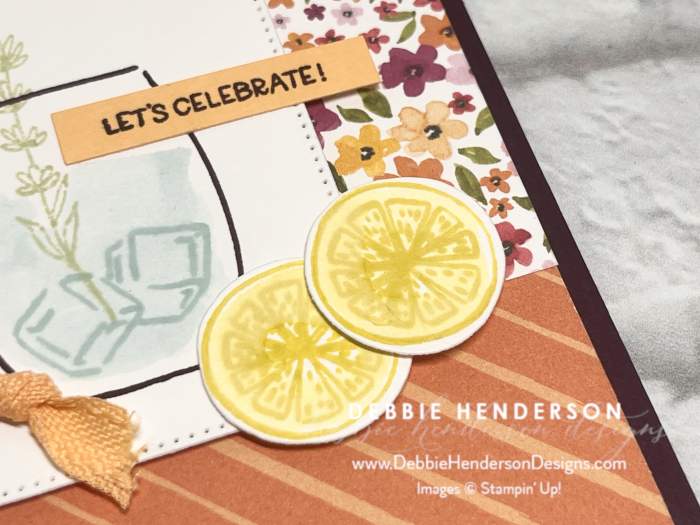
I kept my card very simple for Creatively Simple. A few layers of designer paper, a few stamped image and a ribbon tied in a knot!

I added two layers of designer paper and keep the stamping simple:
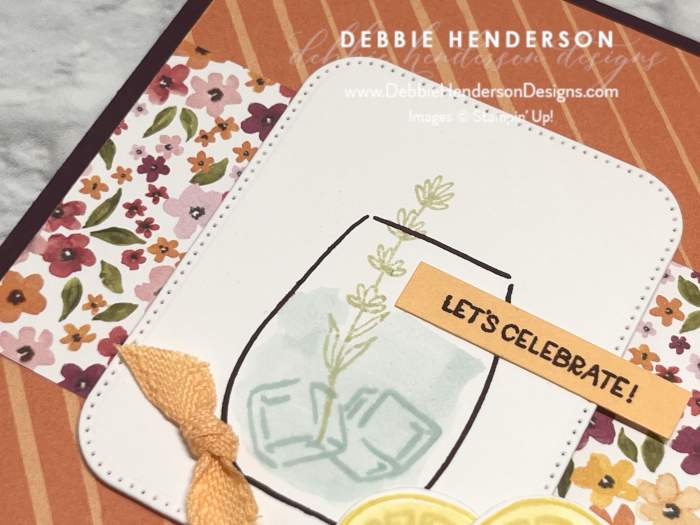
I also used a Water Painted to add ink color to the inside of the glass and the lemon slices. Here’s a list of supplies and the how-to:
Stampin’ Up! Products Used:
- Stamps: Cheers & Sips
- Inks: Blackberry Bliss, Pool Party, Darling Duckling, Soft Sea Foam
- Cardstock: Blackberry Bliss, Peach Pie, Basic White
- Designer Paper: Celebratory Sips
- Tools & Accessories: Cheers & Sips Dies, Nested Essential Dies, Peach Pie Bordered Ribbon, Water Painters, Stampin’ Dimensionals
Card Recipe:
- Card Base: Blackberry Bliss Cardstock 11 x 4-1/4. Score and fold at 5-1/2.
- Layer 2: Celebratory Sips Designer Paper 5-1/4 x 4. Glue to card base.
- Layer 3: Celebratory Sips Designer Paper 4 x 2-1/4. Glue to card front.
- Layer 4: Follow these steps:
- Basic White Cardstock cut with the Nested Essential Dies largest rectangle
- Stamp the glass image with Blackberry Bliss Ink.
- Use a Water Painter to add Pool Party Ink as a color wash inside the glass.
- Stamp the ice cubes with Pool Party Ink.
- Stamp the branch with Soft Sea Foam Ink.
- Glue layer over the Designer Paper strip with Stampin’ Dimensionals.
- Sentiment: Stamp the sentiment on a 1/4″ strip of Peach Pie Cardstock. Cut both ends even. Glue to stamped layer over the glass on the right.
- Lemon Slices: Stamp two lemon slices on Basic White Cardstock with Darling Duckling Ink. Use a Water Painter to color wash the whole slices with Darling Duckling Ink. Cut with the dies and glue to the bottom right corner of the stamped layer.
- Ribbon: Tie a knot with the ribbon and glue to the left bottom of the glass.
Make sure you visit Create With Stamping Friends to see what Connie created for our team this week and visit our tutorial page to see our newest Collection:


Leave a Reply